How to take care of ourselves in swimming pool?

That swimming pool sure feels good in the summer—until you get home and look in the mirror.

Eww!

Chlorine is used to kill bacteria in pools, and it does its job well, but it’s also a harsh chemical bleach that can wreak havoc on your skin and hair. When used in pools, it’s combined with other chemicals to make it generally safe, but over time it can still damage tissues and hair strands.

Fortunately, you don’t have to avoid swimming to protect yourself.

How chlorine in swimming pools damages hair and skin?

Chlorine shows up in our lives in a lot of ways. It’s not only in swimming pools to disinfect the water, but it’s also used to sterilize drinking water and in the manufacturing of products like paper, textiles, paints and plastic, medicines, and more.

WHAT’S THE SCIENCE BEHIND CHLORINE?

The chemical is known as an “oxidizing” agent, meaning that it can oxidize other substances. That means it can encourage the formation of free radicals—those nasty molecules that damage cells, proteins, lipids, and DNA. Too much oxidation can lead to inflammation, disease, and aging.

HOW DOES CHLORINE AFFECT MY SKIN AND HAIR?

Knowing this, you can guess what chlorine does to your hair and skin. It not only robs both of natural moisturizers and oils, but it’s powerful oxidation processes—often called “corrosive”—can result in lasting damage that accentuates the appearance of fine lines and wrinkles. It also destroys vitamin E and essential fatty acids that the skin needs to appear its best.

REGULAR EXPOSURE TO THE CHLORINE IN SWIMMING POOLS CAN RESULT IN THE FOLLOWING CHANGES:

•     Discolored hair
•     Dry, brittle, straw-like hair that’s prone to breakage
•     Frizzy hair
•     Lack of shine to the hair
•     Weak hair that lacks volume
•     Dry, itchy scalp
•     Damage to cuticles
•     Weakened and breaking nails
•     Dry, flaky skin
•     Itchy, rashed, or burned skin
•     Allergic or reactive skin (especially in sensitive skin types)
•     Acne breakouts
•     Accelerated aging in skin, showing up as fine lines and wrinkles

Obviously none of us want to experience any of these all this for the occasional dip in the pool!

how to protect hair and skin from exposure to chlorine

You don’t have to wind up with rough hair and dry skin just because you like to swim. Try the following tips to protect your hair and skin the next time you take a dip.

1. SWIM IN AN OUTDOOR POOL

These allow gases from the chemicals in the water to escape into the air—leaving less to contaminate your hair and skin. These types of pools are also better for your eyes, sinuses, and lungs. If you need to swim indoors, look for well-ventilated pools.

2. SHOWER BEFORE YOU SWIM

Both hair and skin are less likely to absorb water from the pool once they’re already wet. Make sure you’re good and soaked right before you go in to increase resistance.

3. APPLY CONDITIONER OR HAIR OIL

Hair experts recommend that you apply either a deep conditioner or natural oil, like coconut oil, to the hair before going into the pool. It creates a layer between your hair and the chlorine and other chemicals in the pool and helps nourish the hair follicles as well. If you use oil, however, be sure to wear a cap, or that you’re swimming in an indoor pool—otherwise the oil will attract sun damage if you’re outside.

4. WEAR A SWIM CAP

This is the best way to protect your hair, especially if it’s chemically treated. After you’ve showered and applied a conditioner or hair oil, put your cap on. Of course, you can wear a cap without washing your hair if you feel you have a quality one that will prevent all exposure, but for maximum chlorine resistance, it’s best to wash and condition first.

Pin your hair back. If you don’t want to wear a cap, at least pin your hair back to limit exposure.

5. APPLY SKIN LOTION

Like conditioner on your hair, lotion on your skin gives you an extra layer of protection. Apply sun protection if swimming outdoors and if swimming indoors apply an oil or lotion.

6. WASH AFTER YOUR SWIM

Using a gentle, sulfate-free shampoo, wash hair and skin after your swim to get rid of all those chemicals hanging around. Give hair a good soak in the water—a quick wash can leave some chlorine in the follicles. Let the freshwater flow through it for five minutes or so.

7. RINSE WITH APPLE CIDER VINEGAR

You can also use apple cider vinegar as a clarifying rinse—it will help get all those chemicals out of the hair strands, and will also remove dulling buildup. The nice thing about this natural substance is that it not only helps get rid of chlorine, but other damaging things found in pools like copper, salt, and various impurities and contaminants.

8. APPLY CONDITIONER AND MOISTURIZER

Apply a protective, deeply moisturizing conditioner to your hair after washing, and be sure to apply a natural, deeply moisturizing oil or butter to your skin as soon as you step out of the shower.

9. AVOID DRYERS IF YOU CAN

Use a wide-toothed comb to remove tangles after washing, and then pat dry. Avoid using blow dryers if you can as that will limit damage to hair.

Try it and let me know how you feel about it in the comments below.
How to get rid of age spots naturally?

Regardless of your ethnic background or skin colour, eventually most of us will develop some kind of brown or age spots. *sigh* These age spots generally appear on exposed skin areas like the face, back, neck, chest, shoulders and hands. The MAIN culprit being sun exposure. When skin is exposed to the sun, it causes an increase in the production of cells known as melanocytes that increase melanin in the skin, which turns the skin darker.

The good news? Age spots are harmless. They are benign, not cancerous. (But because some skin cancers such as melanoma can look like age spots, you should ask your doctor to examine your skin during your annual checkup.)

Even if age spots are harmless, I personally am not a fan. ;-). So when my mother started noticing more and more of them on her face and arms I started doing some research and it turns out there are lots of simple, all-natural remedies you can use to lighten age spots that you can probably find in your kitchen right now!

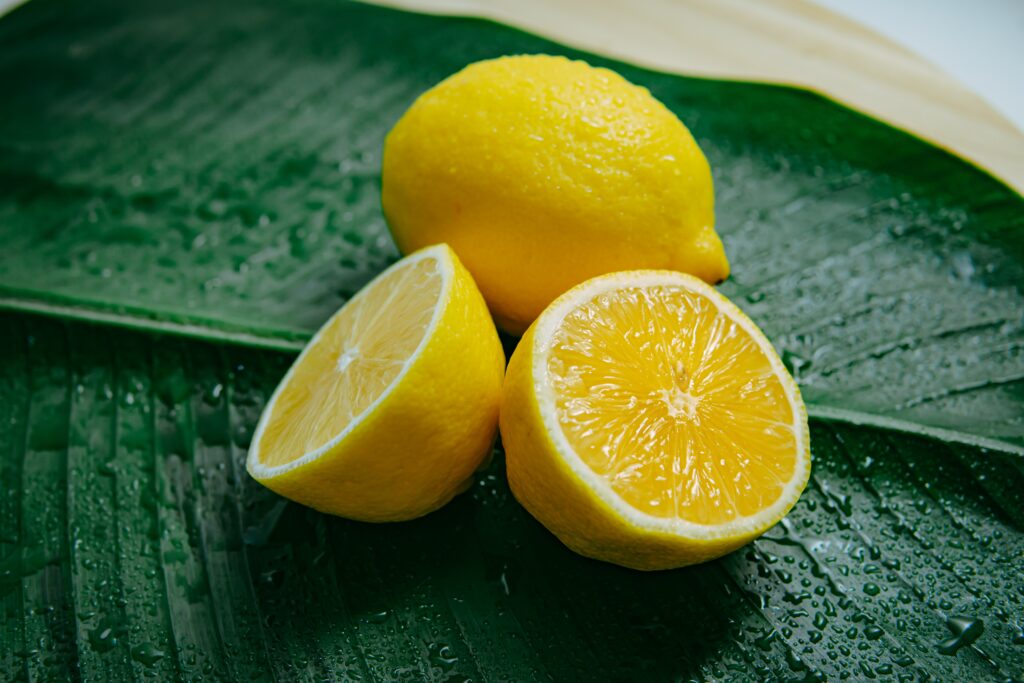
 Lemon Juice

The citric acid in lemon juice is a natural bleaching agent and exfoliates the skin, reducing the appearance of age spots.

  • Simply dab fresh lemon juice directly onto the spots twice daily and you should begin to notice improvements in about two months. Leave the juice on the skin for at least 30 minutes, or as long as you are comfortable with it. You can also leave the juice on the skin overnight.

Notes: If you plan to go outdoors, wait for the juice to dry as it increases the skin’s sensitivity to sunlight. Do not use bottled lemon juice because it may contain other chemicals that may damage the skin. In addition, the amount of citric acid present may have weakened during the time it remained in the bottle.

2. Apple Cider Vinegar

Apple cider vinegar contains natural alpha hydroxy acids, which are known to help lighten sun and age spots.

  • To combat the acidic nature of vinegar, you can mix it with olive oil which will protect the skin from dryness. Apply every day on the skin and remove it after 20 minutes. Your skin will be left soft and smooth.
  • It is normal to experience a little redness or stinging at first (just like you would with a toner). If you have sensitive skin, or if it feels too strong, dilute with water.

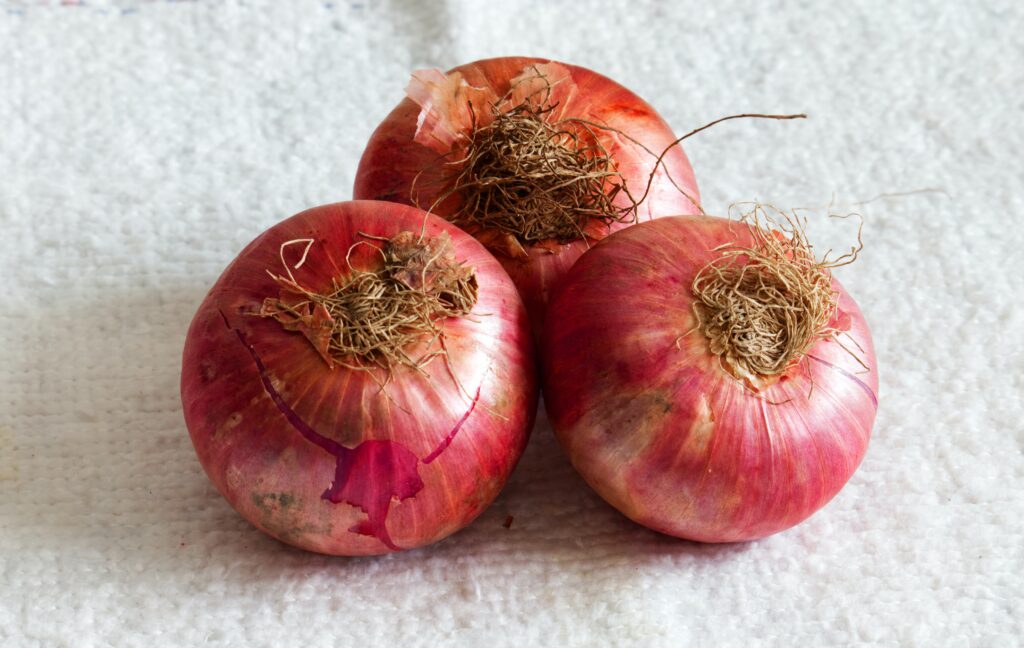
3. Onion Juice

Onions contain sulfur compounds that act as an antiseptic. They also contain acids that facilitate exfoliation. Lemons smell better but some people may find them irritating to the skin. If your skin is intolerant to the lemon juice, try fresh onion juice.

  • Simply slice up some onions and rub the slices over the affected area two or three times a day.
  • Another option is to mix one tablespoon of onion juice with two tablespoons of honey and apply the mixture on the affected area. Leave it on for about 15 minutes before washing the area thoroughly so that the strong smell goes away. Do this once or twice a day.

4. Horseradish

The Vitamin C in horseradish slows production of melanin, the substance responsible for skin pigmentation. Another ingredient in horseradish is glucosinolates. Glucosinolates increase circulation, work as antioxidants, and flush waste from the body.

  • You can make a horseradish paste and apply it directly to the skin. Leave it on for 15 to 20 minutes before washing it off. Use it a few times a week.
  • Another option is to grate a four-inch piece of horseradish with mix it in one-quarter cup of apple cider vinegar and allow the mixture to sit for two weeks. After two weeks, strain the mixture. Use a cotton ball to apply it on the affected skin. Follow this remedy three times a day for at least one month.

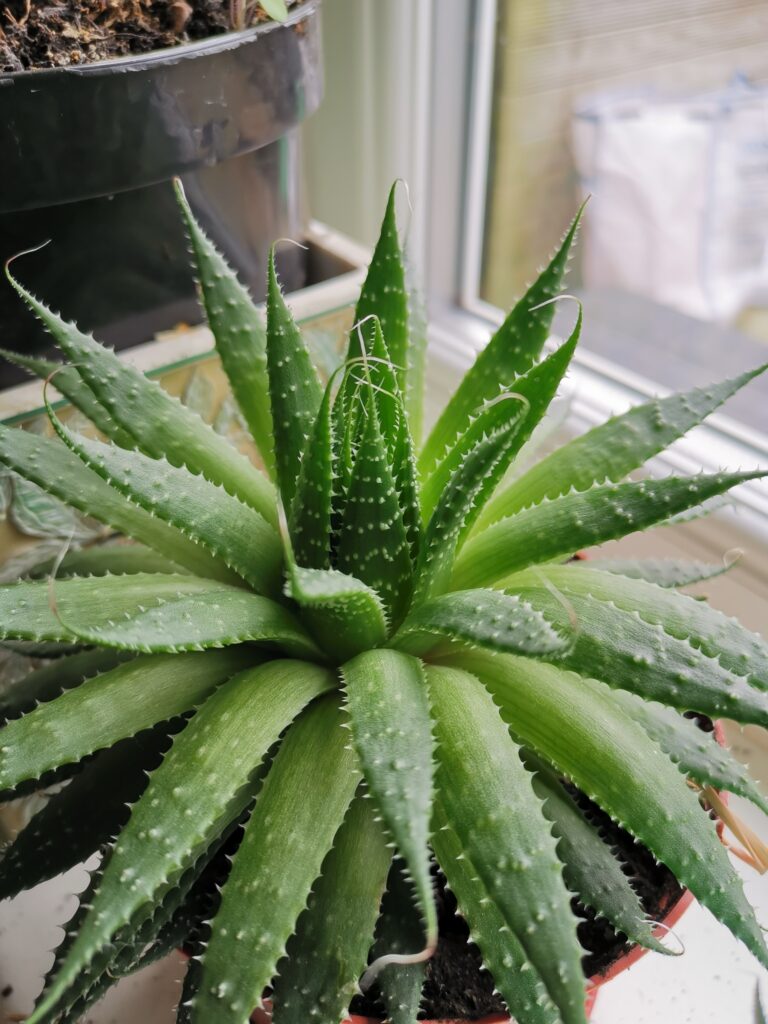
5. Aloe Vera

Aloe vera is commonly used to treat a number of skin ailments, including age spots.

  • Simply rub a little fresh aloe vera gel (taken directly from the plant) onto the affected area and leave to soak in. As aloe vera is very gentle, there is no need to rinse it off. However, you may want to rinse it off if it starts to feel sticky.
  • If you don’t have access to the gel from an aloe vera plant, you can buy fresh aloe vera juice at the market or health food store. This works just as well.

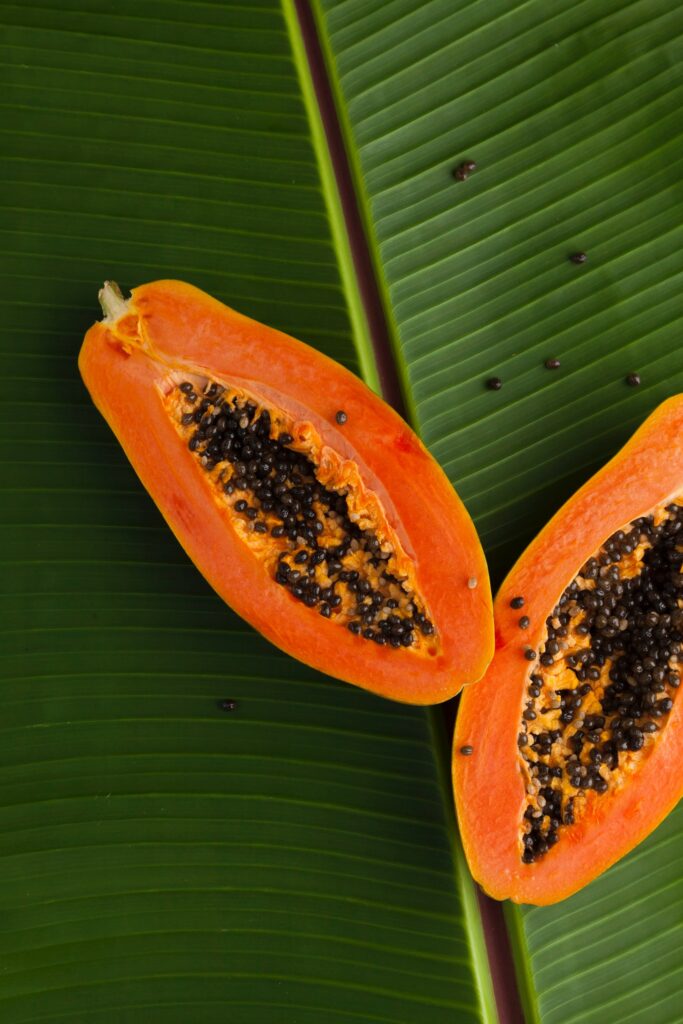
6. Papaya

Certain enzymes and alpha hydroxy acids present in papaya can help exfoliate your skin and reduce age spots, skin blemishes, acne and other skin problems. It will also give your skin a cleaner and brighter look.

  • Cut a thin slice of the skin from a green papaya. Press the fleshy side of the skin to your age spots for 15 to 20 minutes.
  • Alternatively, you can cut the papaya into small chunks and press them into a pulp with a fork or potato masher. Apply the pulp to your age spots with your fingers, allowing the mask to sit for 15 minutes before rinsing. Use daily.

Note: As some people can be allergic to papaya, it is advisable to do a 24-hour patch test before following this remedy.

While we all know that too much sun exposure worsens skin aging, most people don’t know that the light from their digital devices can do the same thing! Learn how to avoid it here.

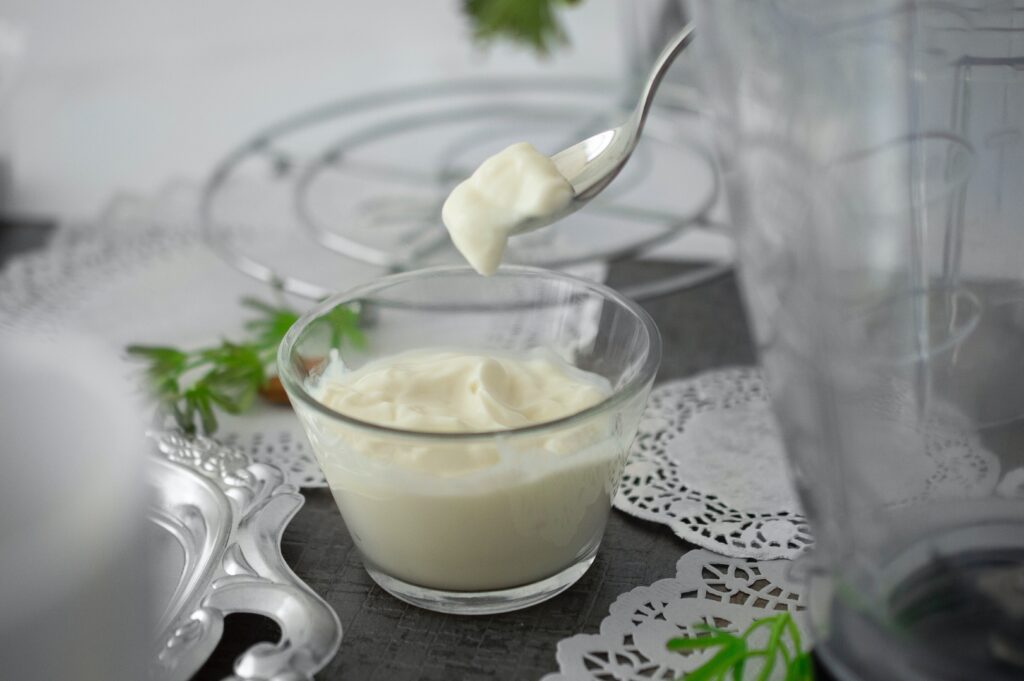
7. Yogurt

The naturally occurring lactic acid also found in yogurt gently removes dead skin cells. As the discolored skin sloughs off, fresh healthy skin is revealed.

  • Apply some plain yogurt directly on the spots. Let it dry on its own for about 20 minutes before rinsing it off with cold water. For faster results, apply yogurt on the affected area before going to bed and leave it on overnight.
  • Alternatively, you can make a skin pack by combining one tablespoon of plain yogurt, two tablespoons of ground oatmeal and one teaspoon of fresh lemon juice. Apply this pack on the spots and allow it to sit for 30 minutes before rinsing it off with cold water. Then apply some moisturizer. Follow this remedy a few times a week.

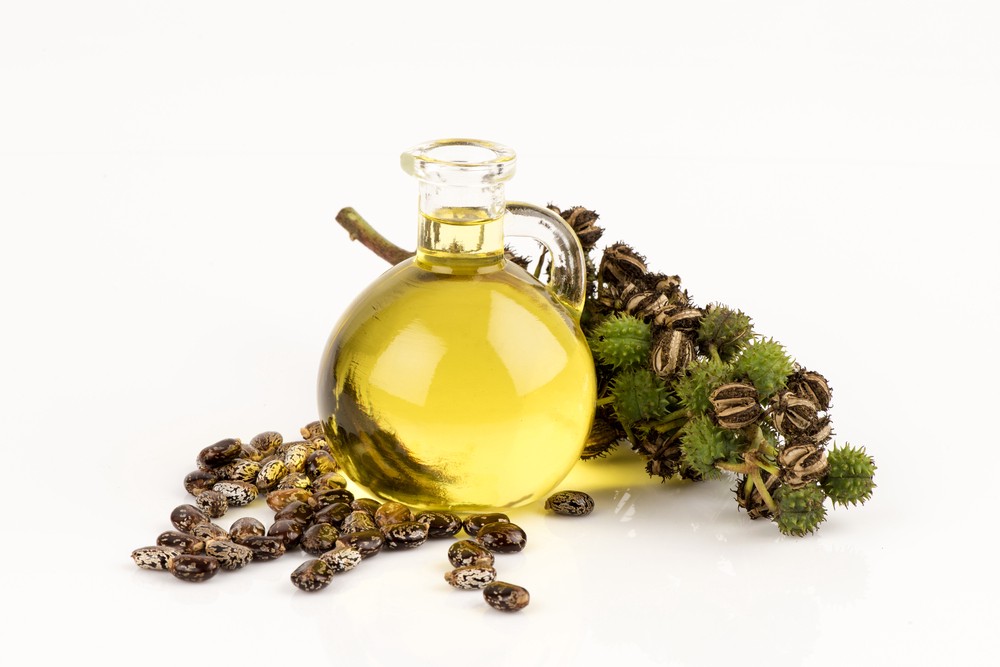
8. Castor Oil

Castor oil is known for its skin healing properties and has proven effective in the treatment of age spots.

  • Apply a little castor oil directly onto the age spots and massage into the skin for a minute or two until absorbed. Do this once in the morning and once in the evening, and you should start to see an improvement in about a month.
  • If you have got dry skin, you can mix a little coconut oil, olive oil or almond oil in with the castor oil for added moisture.

9. Buttermilk

Buttermilk is often used to reduce brown spots and skin pigmentation because it contains lactic acid which tends to lighten the skin safely without causing any irritation.

  • Dip a cotton swab in buttermilk and apply it on the affected area. Wash your skin after 15-20 minutes. If your’s is oily skin or acne prone skin, mix a little lime juice or tomato juice to the buttermilk before applying it to your skin.

10. Sandalwood

Sandalwood is believed to contain effective anti-aging properties, and is often used to reduce the appearance of age spots.

  • Massage a drop of pure sandalwood essential oil directly onto the age spots.
  • Alternatively, you can mix a pinch of sandalwood powder with a couple of drops each of rose water , glycerin and lemon juice. Apply this paste onto the age spots and leave to dry for 20 minutes before rinsing off with cold water.

You will need to have patience when using these home remedies. The brown spots will not disappear in a week or two, so you need to follow the remedies for several weeks to notice positive results.

A final word about PREVENTION:

USE SUNSCREEN!

The first line of defense against age spots and aging skin is smart sun behavior (meaning avoidance or, minimal exposure) along with the daily use of a good sunscreen, SPF 25 or greater.

No other aspect of controlling or reducing skin discolourations is as important as being careful about exposing your skin to the sun and the use of sunscreen!

How to get Tanned With Fair Skin naturally?

My skin is naturally very pale, and while I’m very much at ease with my genetic predicament, there are moments when I would like to don a more sun-kissed look. I spent years half-dreading my Italian summers as I would irrevocably draw a little tragic-comic attention on the beaches and piazzas. Beyond my insecurity, a little research made the objective of having healthy, tanned skin not only achievable, but quite easy to attain.

This article is a summary of methods and solutions that truly work for any type of skin (if it works for me, it’ll work for you, trust me), whatever the weather. Some methods will involve a great deal of patience and will need to be fit into a routine, others are near-instant but will have their own set of pros and cons. Here we will talk about:

  • Tips for tanning if you burn easily
  • Fake tans and techniques for a golden glow
  • Foods that help boost melanin production
  • Indoor tanning bed tips for pale people
  • How to make a tan last
  • Tanning safety for fair-skinned people
  • Whether or not sunlight is good for you
  • UVA, UVB, UVC rays and the UV index

Tips for Tanning If You Burn Easily

Before we begin looking at what methods may suit you on your quest to get a tan with fair skin, here’s a brief and concise look at how protect yourself from the risks of skin cancer and overexposure. Sun protection is absolutely necessary for fair-skinned and dark-skinned people alike.

How to Protect Your Skin

  • Ideally, pale skin should be constantly protected with sunscreen with a Sun Protection Factor (SPF) rating of at least 30. Make sure your sunblock is capable of blocking both UVA and UVB radiation.
  • Even under a newly refreshed layer of sunscreen, limit sun exposure to before 10 AM and after 4 PM to avoid burning and damaging the skin.
  • If you burn in the sun, you’ll burn in a tanning bed. Allow some time to pass between tanning sessions.
  • Skin that is covered more often will be more likely to burn.
  • Know that spray-on DIY tans do not increase your skin’s ability to withstand the sun and tan more easily.

Fake Tans (Sprays and Lotions) for a Golden Glow

The idea that naturally tanned skin is healthier is a common myth and easily dispelled with a little research. For many of us, contemporary fake tanning agents allow us to shake up our look without damaging our skin. Many people are now catching on and employing them as part of their everyday cosmetic routine (roughly 9% of people in the U.S. use self-tanners).

Best Tanning Products for Pale Skin

There are many ways to avoid looking cheap with a fake tan. You can further research tips on streak-free application and recommended sunless tanning products for pale skin. Here are a few different types of products and services to consider:

  • Dyes: These are natural vegetable dyes that stain the skin in authentic-looking tones which fade over the course of a few days.
  • Bronzers: Unlike dyes, these wash off with soap and water, giving you more flexibility.
  • Tan Catalyzers: These products claim to speed up tanning by stimulating melanin production (I have not tried these myself).
  • Beauty Salons: They use high-quality sprays to uniformly achieve a perfect, customized tan. They can be expensive!

Bear in mind that while you may marvel and strut around proudly in the sun with your new tan, artificial tans offer no additional protection from the sun! You will need to continue to use high-protecting SPF sunscreen.

Exfoliation Is Key

The key to successful tanning is exfoliation. Be sure to exfoliate before your tanning session. Not shaving and not waxing and having dry skin is more likely to make a tan fade fast.

DIY natural tanning spray can be made with black tea or coffee beans.
DIY natural tanning spray can be made with black tea or coffee beans. | Source

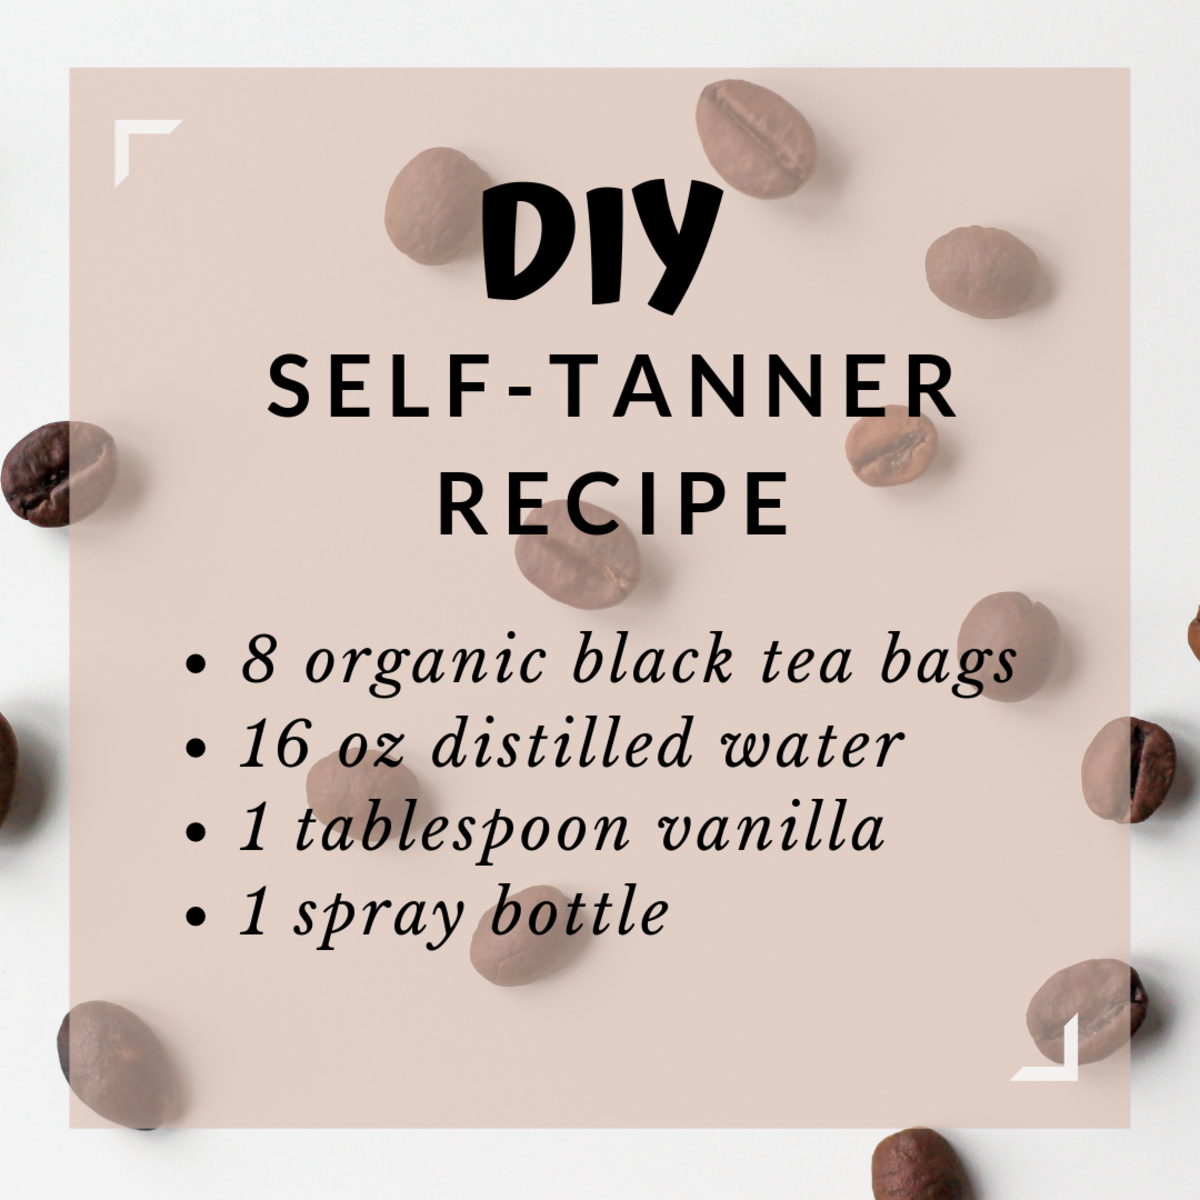
DIY Natural Tanning Spray Recipe

Natural tanners are fun and easy to make and contain natural ingredients. Here’s a fun recipe from DIYNatural.com that utilizes organic black tea bags and vanilla extract. Here’s what you will need:

Supplies

  • 8 bags of organic black tea
  • 16 oz filtered water
  • 1 tablespoon vanilla extract
  • 1 spray bottle

Instructions

  1. Boil 16 oz of filtered water and the vanilla extract.
  2. Pour the boiling water over the tea bags. Let steep for 8 minutes and remove the tea bags.
  3. Let the mixture cool for 30 minutes minimum, then transfer it to a spray bottle.
  4. Exfoliate and apply 4-5 layers of tanner to the desired area; let each application dry in between. Rub the spray in with your hands and wash your hands thoroughly afterward.

Foods That Help Boost Melanin Production

Melanin can actually help protect the skin from ultraviolet radiation and skin damage and its production is thought to be supported by antioxidant-rich foods like dark, leafy greens, dark berries, dark chocolate, and colorful vegetables. Scientific data continues to emerge on the possible melanin-boosting properties of these superfoods.

  • Flavonoids or polyphenols: Found in green tea and turmeric.
  • Vitamin A (retinol): Found in beta carotene containing foods (carrots, spinach, peas) and orange vegetables (squash, sweet potatoes), fish, and meat.
  • Vitamin C: Found in citrus, berries (strawberries), and leafy greens.
  • Vitamin E: Found in vegetables, grains, seeds, and nuts.
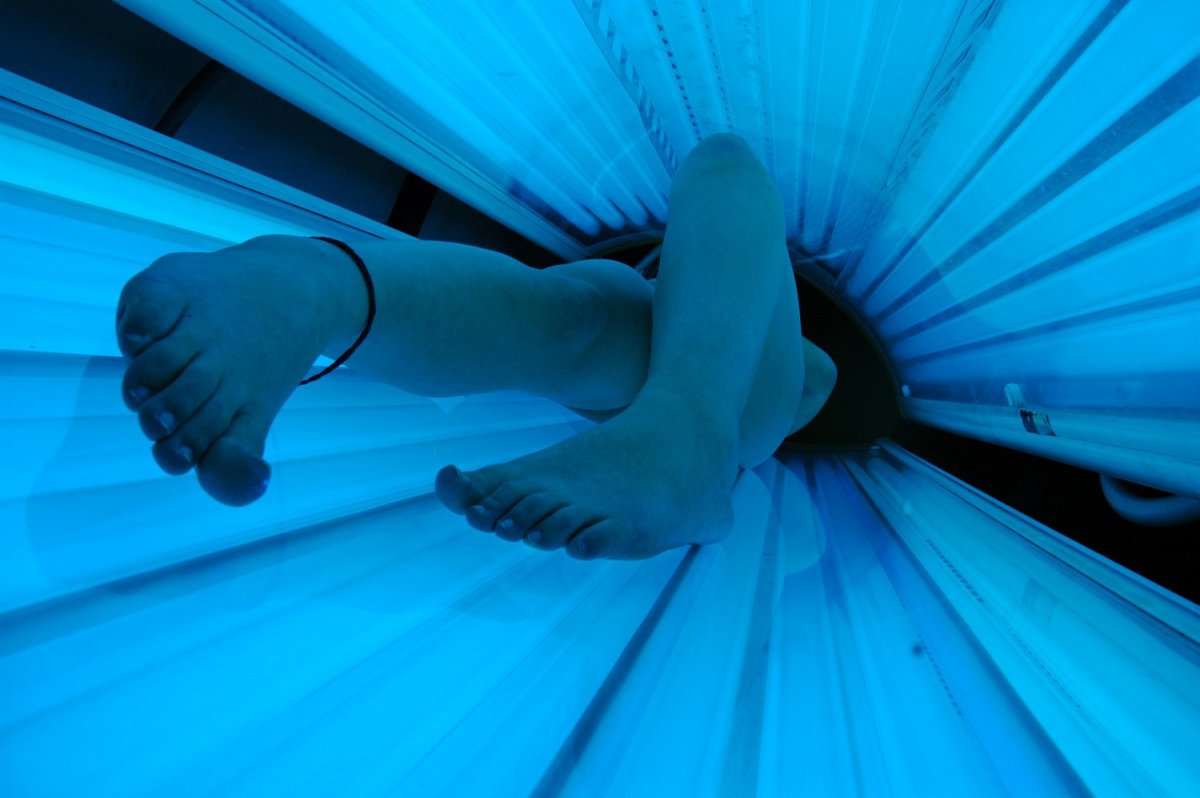
Tanning beds should be avoided by pale or fair-skinned individuals.
Tanning beds should be avoided by pale or fair-skinned individuals. | Source

Indoor Tanning Bed Tips for Pale People

Aside from the risk of skin damage and cancer, many people who use sunbeds or tanning beds claim they offer secondary benefits which make it worth all the hassle. It’s thought that exposure to sun-mimicking UVB rays can lead to a sense of relaxation and well-being and is an effective cure for some forms of dermatitis and psoriasis which we will cover further down.

Are Tanning Beds Safe?

Tanning beds are something of a mixed bag with regards to tanning fair skin. On one hand they can, if used patiently and sensibly, lead to natural, long-lasting results, but on the other, they present many of the same risks that traditional tanning entails. If you are every bit as fair-skinned as I am, tanning beds should not be considered. If you do happen to opt for tanning bed use, there are natural products you can use to accelerate your tan. Use them carefully.

Reports published by the World Health Organization and Cancer Research UK make clear the dangers involved, especially if you:

  • Have freckly skin or natural red hair
  • Have skin that burns easily
  • Have a large number of moles
  • Take certain medications that increase your sensitivity to UV light
  • Are underage

Tips for Safe Tanning Sessions

If you satisfy any of the above, then there are important cancer risks to consider. If you decide to go for a tanning session any way, limit your sessions to a few minutes and gradually increase over the course of a few weeks. Taking 24 to 48-hour intervals between tans can lead to a decent, healthy-looking tan. But remember that it is only healthy-looking—any sign of redness indicates damage to the skin.

How to Make a Tan Last

Our skin cells shed regularly, so before any tanning procedure for any skin type or tone, be sure to exfoliate. It is a good idea to get your shaving or waxing done ahead of time whether you are going out in the sunlight for a natural glow, using a tanning bed, or using a DIY-indoor tanning spray or moisturizer.

Also, be sure to keep your skin moisturized. After exfoliating (consider making a DIY exfoliating scrub), give your skin some time to rest. Always apply sunscreen before exposing your skin to sunlight even if you have a good base tan or dark skin, and be sure to moisturize post-exposure with creams or lotions with natural ingredients—jojoba, coconut oil, etc.

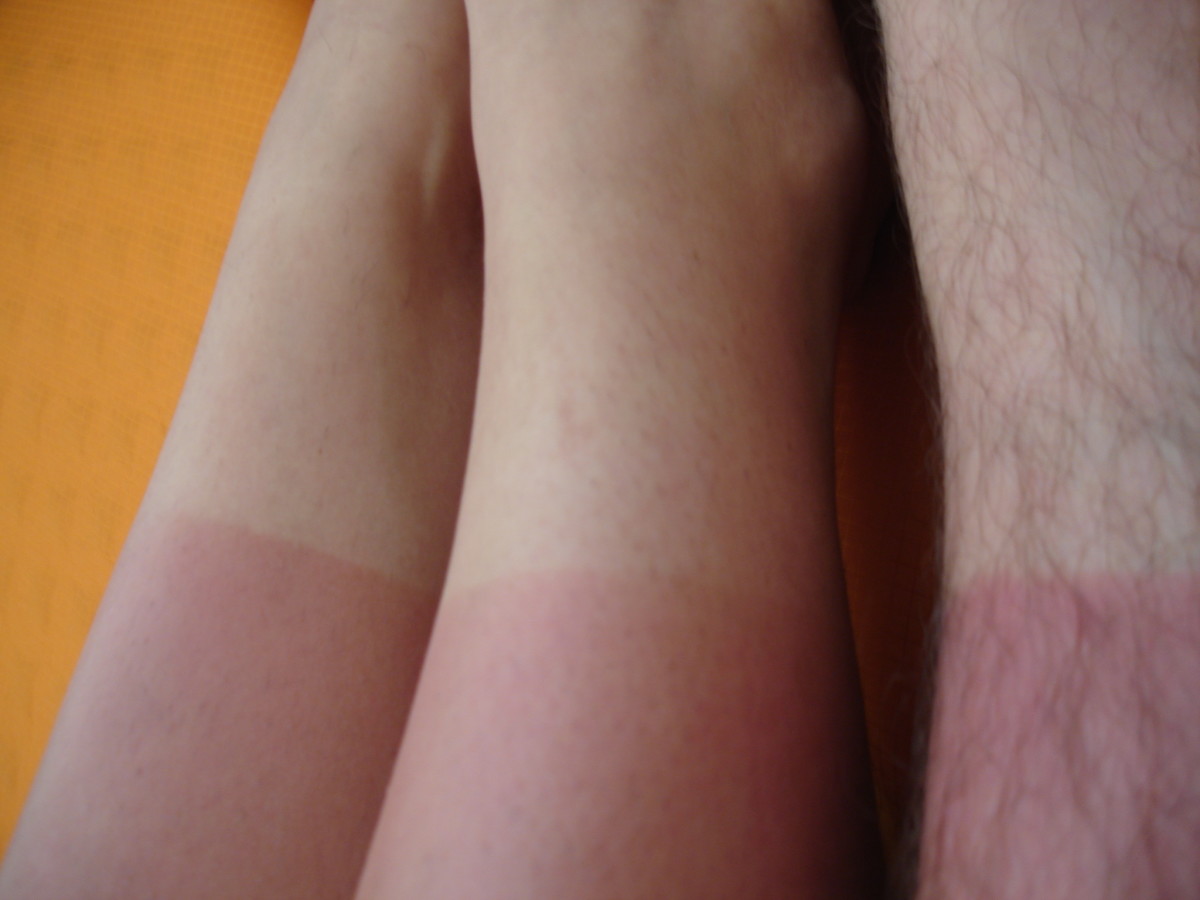
Classic indications of sun damage.
Classic indications of sun damage. | Source

Tanning Safety for Fair-Skinned Individuals

All radiation or ultraviolet (UV light) is classified on the electromagnetic spectrum by range. Electromagnetic radiation (EM) refers to photons (energy particles) that travel at different speeds. The sun produces UV radiation: UVA, UVB, and UVC rays.

Which UV Rays Are Harmful?

Both UVA and UVB rays cause damage. Skin cancer and premature aging result from long-term overexposure to these rays, whereas a sunburn signifies immediate overexposure.

But Isn’t Sunlight Good for You?

You do need some exposure to UVB to help your body to produce vitamin D (D3) which couples with calcium to maintain healthy bones in the body. The amounts we are required to get on a daily basis will vary based on skin tone, clothing, geographic location, the time of year, and diet.

There are some cases where ultraviolet light exposure or phototherapy has helped to resolve the following conditions, but this is done in a controlled environment by a professional:

  • Rickets
  • Psoriasis
  • Eczema
  • Vitiligo
  • Lupus

Ultraviolet (UV) Radiation Classification

TypeWavelengthPenetrationRisks
UVALongWe come into contact with these rays the most. They reach the outer layer of our skin or epidermis and can penetrate untreated glass.Sun damage; aging, wrinkling, skin cancer, and eye damage.
UVBMediumThese rays can penetrate the dermis or middle layer of our skin. UVB rays are strongest between 10 am and 4 pm in warmer months.Sun damage; responsible for sunburns, skin cancer, aging, and eye damage.
UVCShortUVC rays only reach us via artificial sources (lamps, lasers).The most dangerous form of radiation but exposure is rare (welding, torches, etc.)

Pay Attention to the UV Index

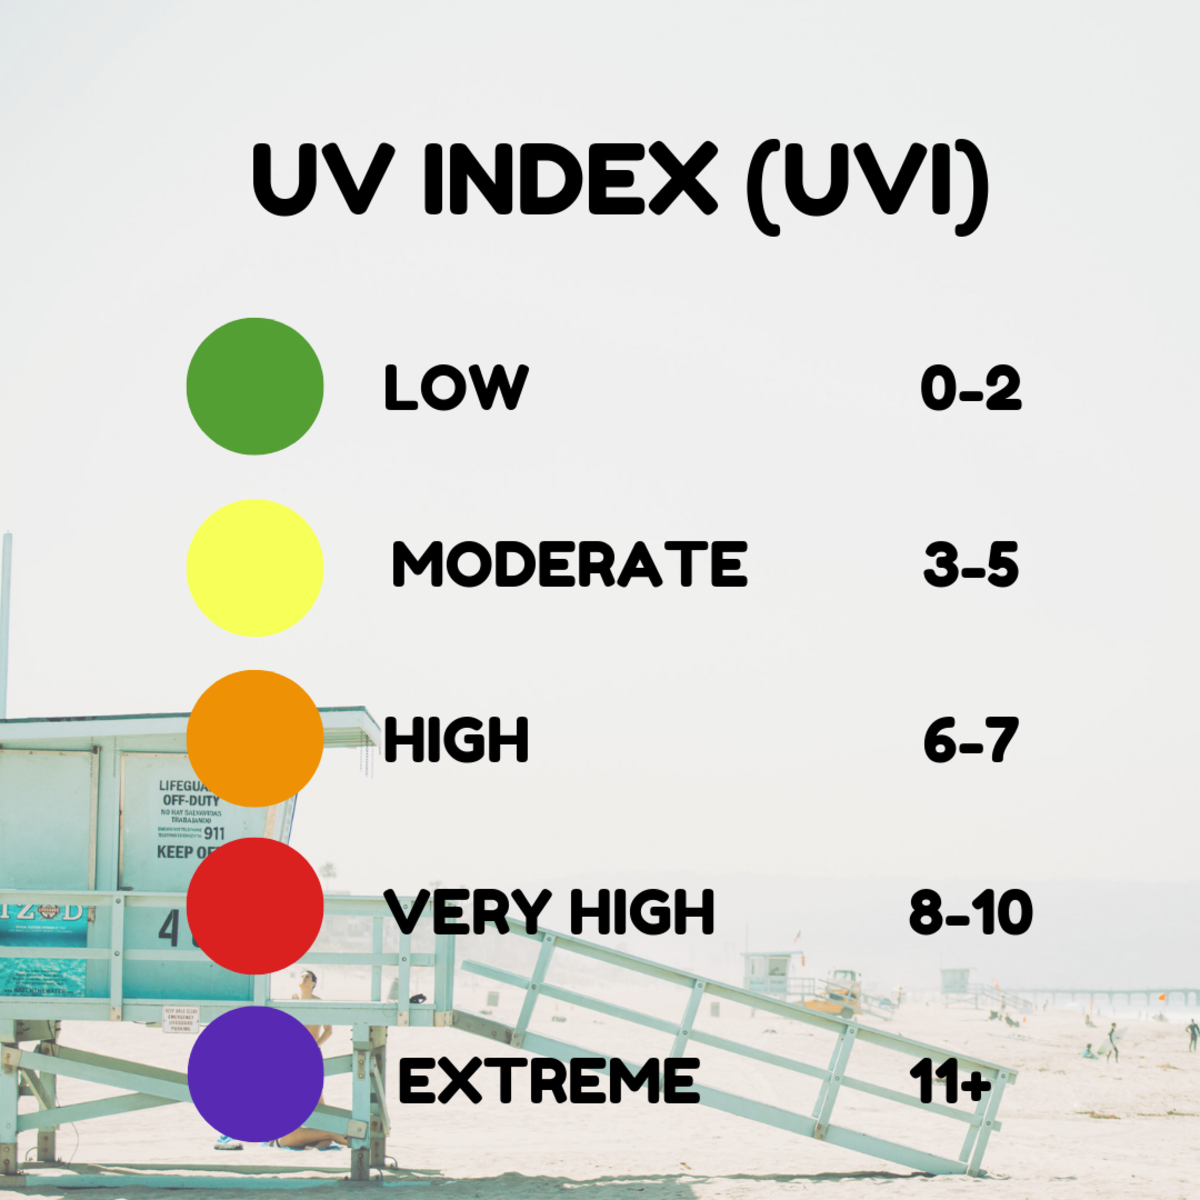
If you are considering tanning or outdoor activities and have fair or freckled skin, you should pay attention to the UV index (UVI) in your region, which rates the number of UV rays that are reaching the Earth’s surface. The higher the number, the more precautions you should take, especially of you are pale or fair-skinned.

The higher the UVI rating, the more dangerous it is to go outside and expose yourself to the sun's rays.
The higher the UVI rating, the more dangerous it is to go outside and expose yourself to the sun’s rays. | Source

Remember: No Tan Is Worth a Burn

Achieving a solid tan on fair skin involves taking it easy. Getting a mild burn is absolutely not required to get some color, in fact, it is counter-productive. If you’re getting red, you’re going too fast. As a rule of thumb, do not attempt to bravely soak in the sun between 10 AM and 4 PM—you won’t be doing yourself any favors. Instead, abide by the following safety tips:

  • Refresh your 30 SPF sunscreen every two hours. Make sure it’s still on when you come back from a swim. Also, make sure that it is waterproof or water-resistant if you go in the water.
  • Prevent flaking by keeping your skin moisturized at all times, especially after a day on the beach.
  • Eat foods that are thought to enhance tans (beetroot, carrots, oranges).
  • If in doubt, remember that you can tan in the shade!

I hope this article has been of help and was not an overly depressing read (it certainly wasn’t my intention)!. If you have any personal tips to share, please do so in the comment section, thanks!

How to remove tan forever naturally in just a week?

During summers, the heat doesn’t just dehydrate us but also absorbs all the moisture from the skin, making it weak and dry. Here are the best home remedie for tanned skin that are completely natural.

Vacation is fun, until you realize your skin has turned two shades darker due to suntan! Don’t you worry, because there are effective methods to get rid of tanned skin. With the right skin care approach, you no longer have to worry about stepping out on the beach.

The first step before starting any skincare regimen is understanding your skin and the science behind your individual concerns. So let’s look at all the causes, types and treatments for tanning.

Highlights

  • What is Tanning?
  • Causes of Tan
  • Types Of Tan
  • Tan Removal Treatments
  • How To Prevent Sun Tanning?
  • Frequently Asked Questions About Tan
  • Skincare Routine To Remove Tan

1. What is Tanning?

Tanning is the process of melanin (skin pigment) increase caused by exposure to sunlight. This is the body’s natural way of shielding the skin from sun damage.

Areas Prone To Tan

  • Face
  • Arms
  • Hands
  • Legs
  • Feet
  • Back
  • Neck

2. Causes of Tan

The solar spectrum (sunlight) consists of UV (ultraviolet) rays at three wavelengths –

  • UV A
  • UV B
  • UV C

When UVA rays penetrate the layers of the skin, they signal the melanocytes (skin’s cells) to produce excess melanin (skin-darkening pigment), which further darkens due to oxidation and causes tanning.

3. Types Of Tan

There are different types of tan and reactions to the sun based on your skin color.

Skin ColorReaction to Sun ExposureLevel of Tanning
Pale whiteAlways burnsNo tan
White to light beigeBurns easilyMinimal tan 
BeigeBurns moderatelyTans to light brown
Light brownBurns minimallyTans to moderate brown
Moderate brownRarely burnsTans to dark brown 
Dark brown or blackNever burnsTans profusely

4. Tan Removal Treatments

Suntan harms the immune system and can lead to further skin damage and aging. So you must analyze your skin type and fight it with the right tan removal treatments accordingly.

You can try one of these treatments to exfoliate dead skin cells and wash out excess melanin:

A. Laser Toning

A dermatologist uses a laser device to break down the melanin pigment and minimise the tan. Lasers (Light Amplification by Stimulated Emission of Radiation) are sources of high-intensity monochromatic coherent light.

When used on the skin, this light energy converts into heat energy to target a specific chromophore (skin pigment-melanin) without harming the surrounding tissue. They penetrate the deeper layers of the skin to get rid of the excess melanin.

B. Chemical Peels

These are used to remove the superficial dead skin layers that have accumulated excess melanin.

Chemical peels use glycolic acid, trichloroacetic acid, salicylic acid, lactic acid, or carbolic acid (phenol). Based on the intensity, chemical peels are classified as:

  • Superficial peel
  • Medium peel
  • Deep peel

C. Microdermabrasions

Microdermabrasion [4] exfoliates the dead skin cells that contain excess accumulated melanin pigment.

It promotes new cells to regenerate more quickly than they would ordinarily. The result – skin that looks firmer, more toned, and more youthful. There are two methods:

Crystal Microdermabrasion: Tiny particles are sprayed on your face through a wand.

Diamond-tip Microdermabrasion: Your skin is exfoliated with direct contact by an applicator.

D. Tan Removal Creams:

Most tan removal creams available in the market lighten the upper layers of the skin. A good tan removal cream or serum penetrates the deeper layers of the skin to inhibit the enzymatic activities that cause melanin production.SkinKraft recommends products that will suit your skin after analysing your skin first. Few questions, few answers and customized skin care recommendations will be all yours.

E. Lightening Actives:

Lightening actives are chemical ingredients that promote skin lightening by fighting tan. Licorice, niacinamide, vitamin C, and Kojic acid are some lightening actives that are effective tan removal ingredients. So what exactly are they?

1. Licorice

Licorice root consists of glabridin and liquiritin, which helps with tanning issues.

2. Vitamin C

The enzyme tyrosinase aids in melanin production in the skin. Vitamin C works as a tyrosinase inhibitor, thereby reducing melanin and tanning.

3. Kojic Acid

Kojic acid is derived from a mushroom-like fungus produced during fermentation. It prohibits the production of melanin and penetrates the upper layers of the skin, causing a lightening effect.

4. Niacinamide

Niacinamide, or vitamin B3, can be used to remove tan and lighten the skin. It is effective as it decreases the amount of melanin transferred by pigment-producing cells (melanocytes) to the surface by more than half.

F. Face Pack, Wax, Face Wash:

De-tan face packs help in the removal of tanned skin cells accumulated in your body after exposure to the sun’s UV rays. They don’t make the skin fairer, but help make the skin even-toned.

These treatments contain natural ingredients like papaya, lemon, and tomato or chemical ingredients like lactic acid, niacinamide, willow bark extract, etc. They help in lightening the upper layers of the skin.

G. Best Home Remedie for Tanned skin:

You need –

  • Dry Orange Peels
  • Curd
  • Lemon
  • Oats
  • Rice Flour
  • Turmeric Powder

Method
•Dry orange peels in sunlight for 3 consecutive days. And after all the moisture content is dried up grind them well in a mixer grinder.
• Then mix this powder with curd, lemon, oats, rice flour and turmeric powder (try to use organic one).
• Blend them well, and apply the mixture on the affected region of skin and let it rest for drying for at least 45 to 60 minutes.
• You will feel a difference in the skin texture, colour.
• Try it for 1 week and you will notice a vast change.
• Whenever possible try to cover your body while you go out under the sun, else try to apply Aloe- Vera gel 15 minutes prior going out under the sun instead of applying sunscreen lotion.

 Other Natural Ingredients to Get Rid of Tan:

  • Tomato and yogurt
  • Orange juice and yogurt
  • Oatmeal and buttermilk
  • Potato juice
  • Aloe vera
  • Ice cubes
  • Bitter gourd
  • Multani mitti

5. How to Prevent Sun Tanning?

  • Cover yourself fully while going out during the day.
  • Use hats, sunglasses, stoles, etc.
  • Avoid going outdoors during peak hours of sunlight (10 am to 2 pm)

The above preventive measures are not scientifically proven. But people have been holding a firm belief in them for ages.

6. Frequently Asked Questions About Tan

Why Do I Tan So Easily?

If you have a darker skin tone (more melanin), you tend to tan easily. The melanin (brown pigment) containing melanocytes spread out across the sun-exposed skin to cover and protect the skin from more damage.

How Long Does it Take For a Tan to Go Away?

It takes 1-4 weeks for the suntan to fade away, depending on the intensity of the tan.

Is Tanning a Sign of Skin Damage?

Tanning increases the risk of exposure to harmful sun rays, which in turn may lead to skin cancer. It is a myth that tan shields your skin from sunburn or other skin damage.

While most dermatologists recommend a minimum of SPF 15 for skin protection, tanned skin provides a Sun Protection Factor (SPF) of only about 2 to 4.

7. Skincare Routine to Remove Tan

A good skincare routine can go a long way in tan removal and keeping the skin healthy. The best way to go about it is by knowing your skin. The following skin care for tanned skin is a simple three-step process to repair and renew your skin.

Skin Care ProductWhat It DoesIdeal Properties
Cleanser Washes away the dirt, dust, excess oils and makeup residue. Gentle, deep cleansing action
MoisturizerRepairs and maintains the skin barrier by offering hydration.Non-greasy, non-occlusive, should not clog your pores
Skin lightening serumRemoves tan, lightens the skin and improves overall skin complexion.Must remove the tan from within 

Looking for skincare that suits your skin and removes your stubborn tan? Subscribe to my newsletter today!

Do let me know how you feel about it under the comment section below. ?

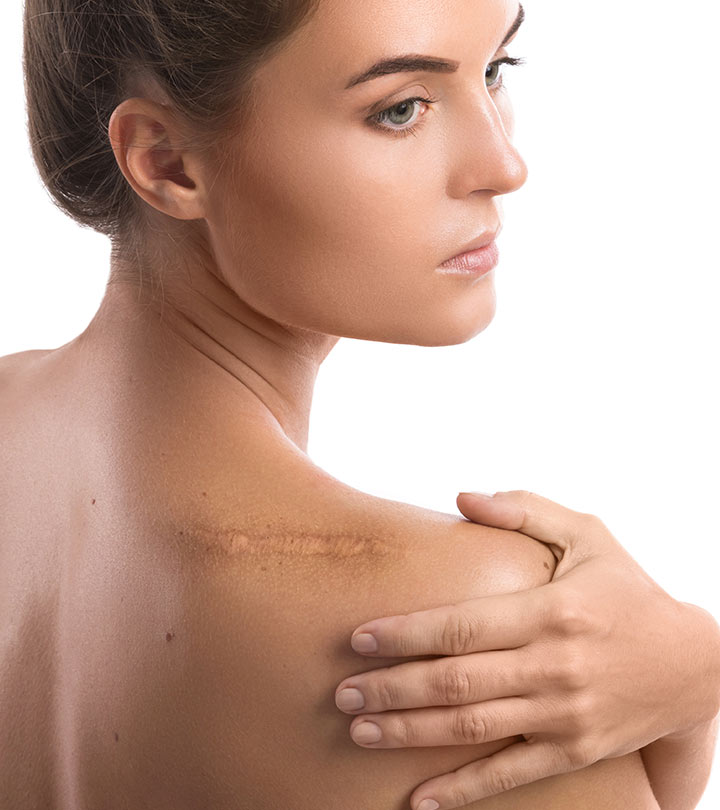
How to remove old scars naturally at home?

How To Get Rid Of Old Scars – Home Remedies And Prevention Tips

Scars can be a result of injuries, burns, acne, blemishes, insect bites, chickenpox, and surgeries. They can tarnish your skin and leave permanent marks on your face and/or body. Although some parts of the body are not visible, having these scars on areas like the face can be embarrassing and difficult to handle.

While these scars do not totally disappear, they become lighter with time on their own. In this article, we have listed natural remedies that can help speed up scar lightening and make them less noticeable. Take a look.

Table Of Contents

  • Types Of Scars
  • How To Get Rid Of Old Scars With Natural Remedies
  • Medical Treatments Options For Old Scars
  • Prevention Tips

Types Of Scars

There are different ways by which you can sustain scars. The different types of scars are:

  • Atrophic Scars: Examples of this kind of scars are stretch marks and pitted acne scars. They create sunken or indentation marks on the body (1).
  • Keloidal Scars: These are large, dark, elevated, and benign tumors that appear behind the ears, back and chest. These scars can also go beyond and grow outside the affected area. These are difficult to correct/revise by surgical methods.
  • Hypertrophic Scars: These are the most common type of scars. They are raised firm growths that do not go beyond the borders of the original injury and are characterised by modular structures.

Scars come in all sizes and shapes, and they are something you would rarely want to show off. Here are some natural methods that can help lighten scars to a great extent.

How To Get Rid Of Old Scars With Natural Remedies

1. Lemon

Lemons are rich in bioactive compounds that exhibit antioxidant properties. These can help reduce the scars that appear due to acne, pimples, or zits and repair your skin.

You Will Need
  • 3-4 teaspoons lemon juice
  • Cotton ball
What You Have To Do
  1. Cleanse the skin around the scarred area.
  2. Dip the cotton ball in lemon juice and dab it on the affected area.
  3. Keep it on for about 10 minutes and then rinse it off.
  4. After washing off the lemon juice, apply a sunscreen if you plan to step out in the sun.
How Often You Should Do This

Repeat this 2-3 times daily.

Note: Lemon juice can cause a stinging sensation on your skin, so you must use this remedy only if you are not allergic to it.

2. Honey

Raw honey is an age-old therapy to fade scars. It contains bioactive compounds that stimulate tissue regeneration and can aid in treating wounds. Baking soda acts as an exfoliant and helps in lightening the scar.

You Will Need
  • 1 teaspoon raw honey
  • 1 teaspoon baking soda
  • A small towel
  • Hot water
What You Have To Do
  1. Mix the raw honey and baking soda.
  2. Massage the mixture on the scar for about 3-5 minutes.
  3. Place a hot towel over the area. When the towel cools down, wipe the area clean.
How Often You Should Do This

Do this twice a day.

3. Onion

Onions have anti-inflammatory properties and also inhibit the production of collagen (6), which in turn helps in fading scars (7).

You Will Need

Onion juice

What You Have To Do
  1. Grate an onion and squeeze out some fresh onion juice.
  2. Apply this directly to the scar and let it dry naturally.
  3. Rinse after 15 minutes.
How Often You Should Do This

You can do this 3-4 times a day.

Note: Do not forget to keep your skin moisturized between the onion juice applications.

4. Aloe Vera Gel

Aloe vera gel has anti-inflammatory properties. This may help reduce skin irritation and scars and encourage the regeneration of new skin cells.

You Will Need

Aloe vera gel

What You Have To Do
  1. Use either freshly extracted aloe vera gel or an organic store-bought one on the scars. Massage it in thoroughly.
  2. Do not rinse it off.
How Often You Should Do This

Reapply 2-3 times daily.

5. Gooseberry

Gooseberry (amla) is rich in vitamin C that may help reduce the formation of scars. It can reduce the appearance of scars due to its tyrosinase inhibitory effect (9). Hence, it may lighten old scars and also prevent the formation of new ones

You Will Need
  • Gooseberry powder
  • Olive oil
What You Have To Do
  1. Mix enough gooseberry powder with olive oil to form a smooth paste that will cover the affected area.
  2. Apply this as a face pack and leave it on for 10-15 minutes.
  3. Rinse with plain water.
How Often You Should Do This

You can use this face pack every alternate day.

 6. Tea Tree Oil

Tea tree oil contains phytochemicals that may help reduce surgical and acne scars gradually. It improves blood circulation to the affected area and also protects it from infections.

You Will Need
  • 2-3 drops tea tree oil
  • 1 teaspoon water or olive oil
What You Have To Do
  1. Dilute the tea tree essential oil in either olive oil or water.
  2. Massage the scarred area with this oil.
  3. Leave it on overnight.
How Often You Should Do This

Repeat this every night before going to bed.

Note: Do a patch test before trying out this remedy as tea tree oil may cause an allergic reaction in some people.

7. Coconut Oil

Coconut oil contains phenolic compounds, antioxidants, and vitamins that can promote the growth of skin cells and tissues (11). This may help eliminate old scars, and its antimicrobial properties can prevent further breakouts.

You Will Need

1 teaspoon virgin coconut oil

What You Have To Do
  1. Warm the coconut oil by rubbing it between your palms
  2. Dab it on the scars and leave it on overnight.
How Often You Should Do This

Do this every night before going to bed.

8. Vitamin Supplements

Vitamin supplements can help a great deal in minimizing facial scars. Vitamin E exhibits wound-healing properties (12). These properties may help reverse the effects of acne scars and blemishes on your skin and leave it looking clearer over time.

You can take a doctor’s prescribed dose of vitamin E supplements. You can also consume foods rich in vitamins like green leafy vegetables, citrus fruits, fish, carrots, and avocados.

9. Potato Juice

Potato juice is rich in phytochemicals that can cleanse your skin and lighten pigmentation or spots caused by acne and pimples. This makes your skin look replenished and clearer.

You Will Need

2- tablespoons potato juice

What You Have To Do
  1. Extract potato juice by crushing a raw potato.
  2. Soak a cotton ball in this juice and apply it to the affected areas.
  3. Leave it on for 10 minutes and wash it off.
How Often You Should Do This

You can apply this juice 2-3 times a week.

10. Lavender Oil

Lavender oil possesses antifungal, anti-inflammatory, and antimicrobial properties (14). This may help fight any inflammatory response to infections on your skin and heal the affected area and eliminate scars over time.

You Will Need
  • 2-3 drops lavender oil
  • 1 teaspoon sweet almond oil
What You Have To Do
  1. Mix two to three drops of lavender oil with a teaspoon of sweet almond oil.
  2. Dab a cotton ball with the mixture and apply it to the affected areas.
  3. Rinse your face thoroughly after 10 minutes.
How Often You Should Do This

Do this 2-3 times daily.

11. Rosehip Oil

Rosehip oil is composed of bioactive compounds that exhibit wound-healing properties (15). It is observed that it can speed up the transition of macrophages phenotypes that can help improve scars over time.

You Will Need
  • 2-3 drops rosehip oil
  • 1 teaspoon sweet almond oil
What You Have To Do
  1. Mix two to three drops of rosehip oil with a teaspoon of sweet almond oil.
  2. Apply the mixture to the affected areas. Leave it on overnight.
  3. Wash it off in the morning.
How Often You Should Do This

You can do this 2-3 times daily.

Apart from these home remedies, there are various treatment options available to get rid of scars. In the next section, we will explore medical treatment options for scars.

Medical Treatments Options For Old Scars

Here are some of the commonly used methods you can opt for:

  • Over The Counter Drugs

There are several OTC drugs or creams that can be used to fade old scars, but use them only under the guidance of the doctor or a pharmacist. Mederma is one such OTC ointment that can be used to fade scars. It is a chemical formulation containing aqueous extracts of onion and is widely used in eliminating post-surgical scars. Consulting a certified dermatologist is recommended so that you are prescribed the correct type of cream to remove your old scars.

  • Chemical Peels

Chemical peels are known to lighten old scars by using chemical exfoliants. This procedure also removes the dullness from the skin and can improve overall skin texture. Many cosmetic clinics offer various types of chemical peels depending on the nature of the scar you want to get rid of. This method works best for superficial scars.

  • Laser Treatments

This method is used on persistent and stubborn scars. Laser therapy employs the use of photothermal energy to stimulate the remodeling of collagen and elastin in the scar tissue and skin. Different lasers are used for different types of scars.

Prevention Tips

Here are a few tips you can bear in mind to prevent scarring:

  • If you have sustained a cut/scrape, ensure that you keep the wound covered and clean until it is healed.
  • You could apply OTC ointments or petroleum jelly to the wounded area to minimize scarring.
  • Always keep the wound dressing clean and hygienic.
  • If you had to get stitches for your wound, consult your doctor regarding care for the affected site after it is healed to reduce scarring.

These remedies tips can help ensure that the old scar looks less prominent and reduce the risk of scarring after sustaining a wound or an injury. Consult your doctor to understand which remedy might be suitable for you.

How to Manicure and Pedicure at home with natural ingredients?

Remember that scene from Legally Blonde, where a very upset Elle Woods walked into the nearest salon for quick mani? Many Indian women still need to learn and appreciate the calming and de-stressing qualities of an hour-long manicure. Besides its therapeutic properties, regular manicures should be a part of every woman’s grooming routine. And if you can’t always afford to make it to the salon, we’ll teach you how to do a manicure at home naturally.

In this post you will learn:

  • Benefits of a manicure
  • How to do a manicure at home naturally
  • How to shape your nails (with video)
  • 5 Must-Haves for a Mani-kit

6 Benefits of a Manicure: Why You Need One Regularly

Women think of manicures as a fashion tick mark rather a than a part of everyday hygiene. Here are 6 benefits of a manicure.

Manicures clean your nails

We use our hands (and feet) for everything, making them the most exposed parts our body, to dust and dirt. While washing may cleanse your hands, it doesn’t remove the dirt hidden in your nails; dirt which collects over time and can lead to infection. Regular manicures help keep dirt, germs and debris at bay.

Manicures nourish your cuticles

Cuticles are the dead skin that collect at the base of your nails. They act as germ-barrier between the nail plate(the visible part of your nail) and the thick layers of skin surrounding your nail, the eponychium. If regularly do a manicure at home, it will keep the  cuticles soft, nourished, and keep them in good shape.

Manicures improve your blood circulation

Like we said earlier, our hands our the most used, therefore most worked parts of our bodies. And in comparison to our legs, far more ignored. The 20 minute massage, that is an essential step of any manicure, stimulates the blood flow in your hands and improves the mobility in the joints of the fingers and wrists.

Manicures help you relax

What follows a great massage? An indulgent dose of relaxation of course! Besides working on your physical muscles, a great massage touches all the key pressure points on your palm and fingertips, relaxing your entire body.

Manicures make hands soft

The creamy massage coupled with the scrubbing and exfoliating, leave your hands feeling baby soft and clean for as long 2 weeks, when it is time for your next manicure session!

How to Do a Manicure at Home Naturally

We don’t always have the time (or the budget) to visit a salon for a monthly mani-pedi. The alternative is to do this simple cut-file-polish manicure at home to keep your tips looking tops all week. You can even add an exfoliation step using a simple homemade manicure scrub.

Read on to know how to do manicure step by step with natural ingredients, using things that are probably already in your home!

Things You Will Need

For the cut-file-polish

  • Nail cutter
  • Nail filer
  • Nail paints

For the hand soak

  • Shallow tub or a deep dish
  • Shampoo or body wash
  • Lemon juice
  • Honey

For the homemade manicure scrub

  • Sugar
  • Olive oil
  • Lemon juice
Step by Step Guide on How to do a Manicure at Home

Step 1: Cut

To start, wash your hands with a medicated soap and then, remove old nail paint with a good quality nail paint remover and a soft cotton ball. Next, cut your nails fingernails straight across to reduce the length; clip the corners into your preferred nail shape. You could either go traditional with a rounded or square shape, or experiment with trending nail shapes like an almond, lipstick or ballerina.

Pro Tip: Use small cuts instead trying to cut off the free-edge, or the white part of your nail in a single big cut.

Step 2: File

File away the rough edges off by swiping the filer on the edges of the nail in the same direction to get a smooth finish. Swiping the filer back and forth in different directions can tear the nails.

Watch this video to learn to how shape your nails.

Source: Nail Career Education

Step 3: Soak

Fill the tub with hot (not boiling!) water. Add 2 tablespoons of honey and the juice of one lemon. Lemon works as a great de-tanning and whitening agent while honey is a fantastic moisturiser. Soak your hands in this solution for 5 minutes or more to soften them. After your hands are nice and soft, use the back of your nail filer’s handle to push back the cuticles. Dab a little olive oil on the cuticles to keep them soft.

Want to know about some good DIY foot soaks? CLICK HERE for more!

Step 4: Scrub

Although there are many homemade manicure scrubs out there, this simple lemon, sugar and olive oil scrub is suitable for all skin types. Mix two teaspoons of sugar, half a teaspoon of olive oil, and a teaspoonful of lemon juice in a small bowl. The heat from your palms will melt the sugar crystals, which in turn will gently exfoliate away dead skin cells. The olive oil helps to seal in the moisture into your hands.

Be sure to scrub for 2 minutes before rinsing your hands in lukewarm water. Pat them dry on a soft towel.

Pro Tip: Scrub in circular motions for best results. This would improve the blood circulation in your hands and bring a glow to your skin.

Step 5: Polish

The final step to pamper your beautiful hands is to apply some nail paint. You could try a trendy minimalist nail art style. They’re simple to do, and look elegant.

Mani Must-Haves: How to build a basic manicure kit

For a basic manicure kit to keep at home, you will need the following:

  • Nail cutter (small to medium sized)
  • Nail filer
  • Nail buffer and shiner
  • Cuticle pusher
  • Orange stick
  • Pumice stone
  • Nail brush
  • Antiseptic solution (Dettol, Savlon etc.)
  • Vitamin E oil
  • Clear nail polish

Final Words of Advice

There are few things you should keep in mind when doing a manicure, like moisturising your hands after using a nail polish remover, since the latter dehydrates your skin. Also, never keep nail paint on for more than two weeks since that would lead to nail discolouration. In fact, leave your nails ‘free’ of nail polish for a week before applying again.

Let me know how you feel about it in the comments below.
Say Hi! to stronger and beautiful nails

Every product is independently selected by our editors. If you buy something through our links, we may earn an affiliate commission.

Keep them out of the water

Avoid excessive water exposure, as it can soften your nails.” With over-hydration, our nail beds expand as water is absorbed, then contract as the moisture evaporates, leaving them noticeably flimsy and prone to peeling. To keep your nails from getting soft, always wear rubber gloves when you wash dishes, and minimise time spent in hot showers and swimming pools. Aside from keeping them dry, these 14 tips will keep your nails healthy and beautiful.

woman filling nails

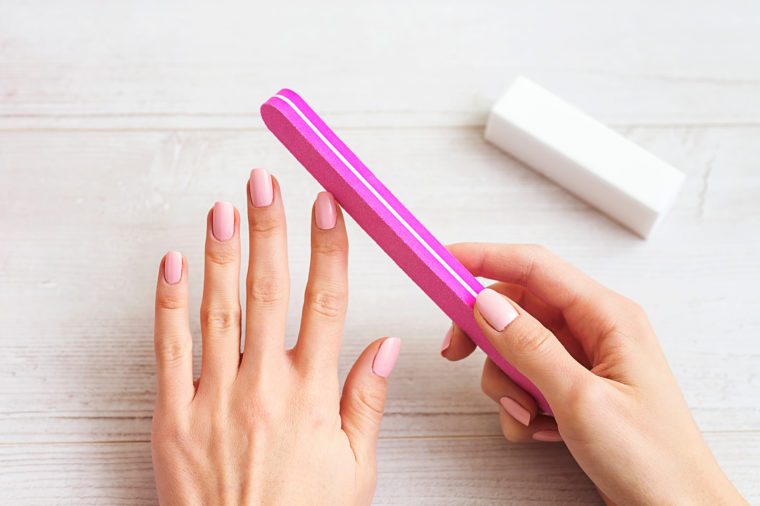
File right

How you file your nails can make or break them—literally. “Filing in one direction, lifting the file each time on the return stroke is the best method to prevent damage or breakage,” says Jin Soon Choi, founder of Jin Soon Hand and Foot Spa in New York City. “The most important thing is to choose the right grade file,” she explains. “If you use a very high grain file, it’s going to cause breakage, but if you use a fine grade file (like 400 to 600 grit) and do not file aggressively, you can file in a back and forth motion.”

chemical nail polish different colors options

Keep them chemical-free

Warning: You’re not going to like what you’re about to read. Many of your favourite nail polishes, acrylics, and nail polish removers are full of harsh chemicals that cause nail brittleness, dryness, and thinning. So, how to strengthen nails? It’s wise to avoid gel polishes, acrylic nail glue, acetone soaks, and acetone nail polish remover at all costs. “Avoid chemical irritants, as your nails can be damaged from chemical exposures,” says Dr. Jaber. If you can’t resist having your nails painted, stick to non-toxic nail polish, like from Zoya, JinSOON, and LONDONTOWN (which is actually vegan, gluten-free, and cruelty-free), and acetone-free removers that won’t strip your nails and skin of their natural oils. Find out other secrets your manicurist won’t tell you.

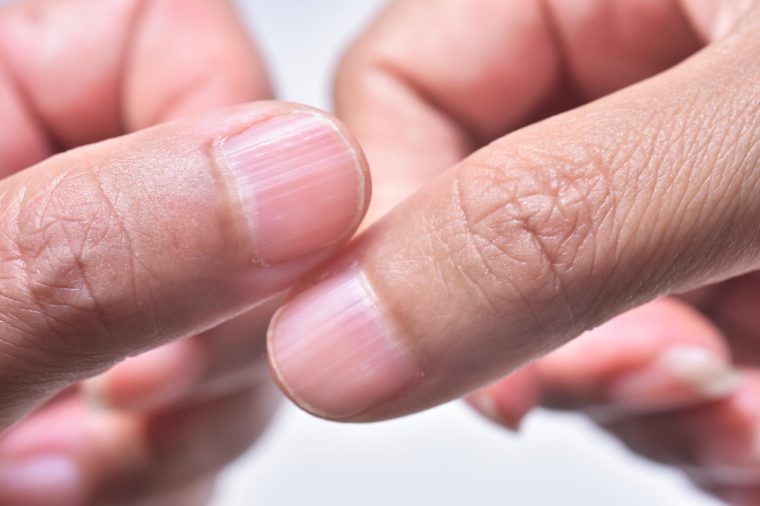
vertical ridges in thumbnails

Pamper your cuticles

Though your manicurist may say otherwise, there is actually no reason to cut your cuticles, according to Choi. In fact, your cuticles are part of your skin and serve the important purpose of acting as your nail’s protective barrier. “When you cut the cuticle, it may look great, but it’s going to peel off two or three days later,” she warns. Further, cutting your cuticles may lead to infection, ridges, white lines, and other nail problems. If you don’t like the look of your cuticles, Choi advises gently pushing back the cuticle edge and only snipping hangnails. To keep them healthy, make sure to always moisturize your cuticles with a nourishing oil like L’Occitane Nourishing Nail & Cuticle Oil.

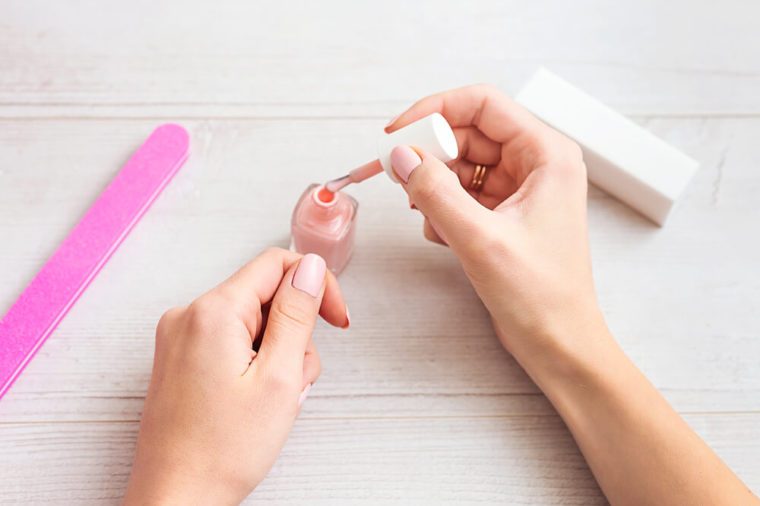
Female hands applying light pink nail polish on wooden table with nail set. Manicure nail paint pink color.

Give the polish a rest

Many of us are guilty of trying to making our nail polish last as long as possible, says Choi. We hope to extend the life of our color with constant touch-ups, then when the chips become too noticeable to bear, we head straight to a salon for a fresh coat. This all makes sense for cosmetic purposes, but having nail polish on your nails for too long greatly damages their strength and overall health, warns Dr. Jaber. Even the safest nail polishes can leave your nails brittle, thin, and dry if left on for too long. Instead, fully remove your nail polish after five days and allow them the same amount of time to recover before getting them re-painted. Leaving polish on too long is just one of the surprising ways you could be ruining your nails.

Grilled chicken and fresh vegetable salad on a light background, top view.
KIIAN OKSANA/SHUTTERSTOCK

Stick to a healthy diet

One of the keys for how to strengthen nails is maintaining a healthy diet. Foods like blueberries that are full of antioxidants help protect your body’s cells from free radical damage, while leafy greens provide the iron you need for nail strength. Magnesium-rich almonds are great for smoothing your nails’ vertical ridges found a study published in the Austin Journal of Nutrition and Food Sciences. Any nutritional deficiency could potentially affect the health of your nails so eat a wide variety of fruits, vegetables, whole grains and lean proteins.
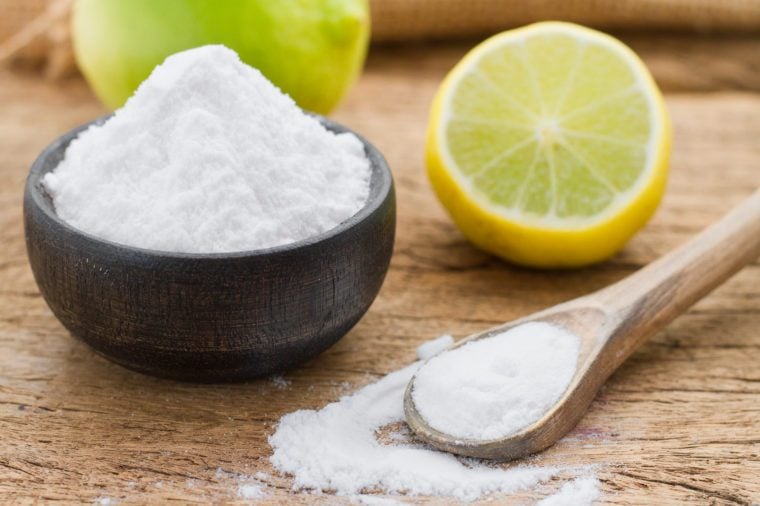
baking soda in a wooden bowl with a wooden spoon, and lemon on a wooden surface

Do at-home nail treatments

If your nails look like they need some major TLC, do an at-home nail treatment. In the same way your face occasionally needs a super hydrating face mask, so do your nails. Consider dermatologist Dana Stern’s Deep Hydrating Formula, a hybrid gel-oil that hydrates and strengthens nails or Dermelect’s Peptide Infused Nail Recovery System for Damaged or Aging Nails. Erica Marton, a celebrity manicurist, suggests these home remedies: For yellow nails, make a paste of lemon juice and baking soda and let it sit on nails for about 15 minutes to remove stains. If your cuticles are extremely dry, she suggests dabbing them with olive or coconut oil. Here are the subtle signs your hands are begging for TLC.

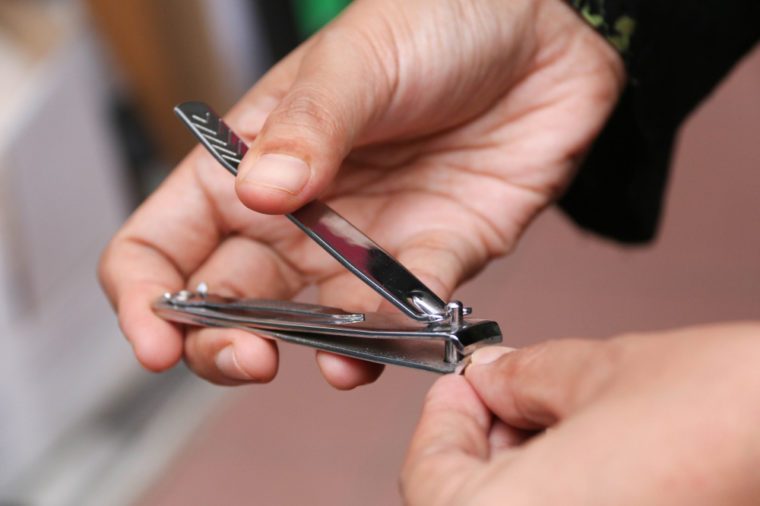
hand cut nails by using nail clipper

Always cut your nails

As much as you might love the look of long, beautifully-shaped fingernails, it’s best to avoid growing them out if you want to make them stronger. “Keep your nails shorter, as the longer they are, the easier it is for them to get traumatized,” says Dr. Jaber. Short nails are far less likely to be broken in your everyday life. As an added bonus, it’s also much easier to maintain the appearance of nails when they’re short! Discover more tips to protect your nails.

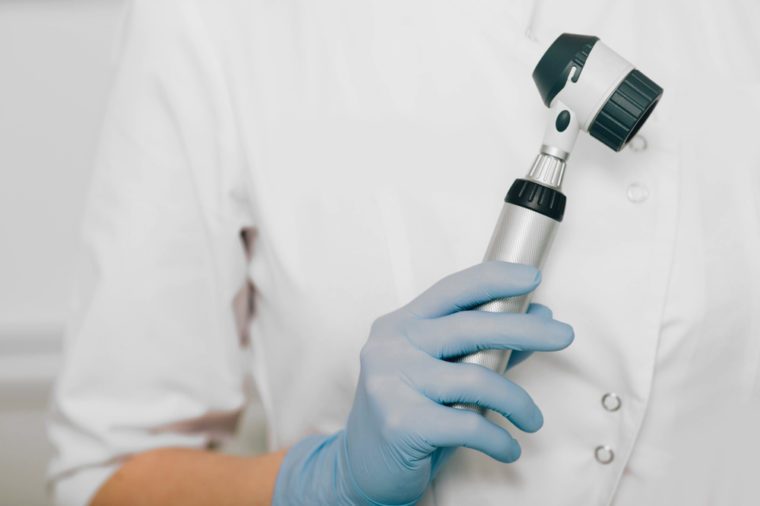
dermatologist with dermatoscope, close-up hand with dermatoscope

Visit your derm

If your nails remain brittle no matter how hard you work to repair and strengthen them, it may be time to visit an expert. “If these methods are not effective then see your dermatologist, as there are prescription nail lacquers like Genadur or Nuvail which can sometimes strengthen your nails.

How to grow your hair from shaving head?

If you’re one of the tens of thousands of men and women who braved to get bald because of staying home alone, I mean being quarantined , chances are you’re not quite bald anymore.

On average, hair grows about 1/2 inch per month.But did you know there are steps you can take to help your hair grow faster and stronger?

Whether you long for long locks or you’re just growing your hair out to shave it again, here’s some great advice from the ones who know hair best: our St. Baldrick’s barbers.

1. Eat healthy.

Good nutrition is essential for healthy, growing hair. You’ll want to eat a diet rich in leafy greens, lean meats, nuts and seeds. You might also consider taking hair-nourishing supplements like biotin and vitamin E.

“The secret to growing out healthy hair is to first eat healthy. Fresh fruits and vegetables will feed your hair great nutrients.”— Jenna Wilkinson, Las Vegas, NV

2. Trim regularly.

Even though you’re going for length, you’ll still want to trim your hair every four to eight weeks to prevent the hair from breaking and thinning out. As the hair gets longer, use conditioner to keep the ends healthy and strong.

“The best tip I have for growing out hair is to get your hair trimmed. By trimming the hair, you are cutting off the split ends and preventing the hair from snapping off.”— Jenny Hartman, Arlington Heights, IL

3. Massage your dome.

A scalp massage doesn’t just feel great — it can help you relax AND help your hair grow faster! Place all 10 fingertips on your head, apply gentle pressure and rub in small circles. Work your fingers around your head from your hairline down to the nape of your neck. For best results, massage your head at least once a day for two minutes.

“Scalp massaging will increase blood flow and circulation to the head, giving those hair follicles more stimulation to grow.”— Antonio Scalora, Ottawa, IL

4. Use hibiscus oil with onion juice.

You can still have fun with all the in-between lengths while you’re waiting for your hair to get long. Hibiscus oil and Onion juice are really best for your scalp and this gets you healthiest root for you future hair.

How to make Homemade Hibiscus Oil

Ingredients –

  • Hibiscus Flower and Leaf – Count 12
  • Black seed- 2 gms
  • Coconut Oil – 100 ml

Make powder of Hibiscus Flower and Leaf in a grinder. After that add the powder to the Coconut Oil and add some Black seeds. And heat it till it boils.

After this keep the oil in a good air tight container. And use it every night before sleep. And take a hot shower every morning to open the hair follicles. And with this add the Onion juice to the open pores in your hair.

Trust me this will help your hair grow very thick and heavy. And you will definitely feel shaving head was worthy !!!

5. Be patient.

It’s going to take time for it to get long, but if you take good care of your hair, you’ll be rocking the long locks before you know it! If you find yourself growing impatient, just remember why you shaved your head in the first place. Like the 46 Mommas say, “Hair grows back. Kids don’t.”

“You have done an extraordinary thing for some extraordinary reason, and we all want to thank you from the bottom of our hearts.”

How to grow baby hair naturally?

I’m back with another post! Today, we would be talking about growing baby hair on the forehead. Baby hair are generally tender and soft hair which grow on your back, shoulder, ears, and face. It is normal to see baby hair on the body, even among women. Baby hair looks good on the forehead as it gives your locks a fuller look. If you want to know how you can grow baby hair on your forehead, keep reading.

How to Grow Baby Hair on Forehead

Olive oil massage

Olives with drop oil on wood spoon

Olive oil contains antioxidants and anti-inflammatory properties which can boost the growth of baby hair on the forehead. It also helps to keep your skin nourished and moisturized, thus increasing the chance of boosting hair growth. Take some olive oil and massage it on the forehead. Leave it overnight and wash off with cold water in the morning. Repeat this remedy every day for a month to observe baby hair on the forehead.

Aloe vera treatment

Another effective treatment which can boost hair growth is using aloe vera. Aloe vera contains essential enzymes and properties which can make baby hair grow quicker. Take aloe vera leaves and scoop out fresh aloe vera. Apply it on the forehead and massage for some time. Wash off after an hour. You can also use aloe vera juice.

Camphor oil

Camphor used in herbal medicine

Camphor oil can make baby hair grow on the forehead and also helps to restore the pH balance of the skin. It boosts hair growth and stimulates blood flow to the scalp. Take 2-3 spoons of camphor oil and mix it with equal amount of yogurt. Apply this mixture on the forehead and wait for an hour. Wash off with water.

Spinach juice

Due to the high amount of Omega 3 fatty acids present in spinach, it can help baby hair grow on the forehead. Omega 3 fatty acids are extremely important in boosting hair growth. Take a few leaves of spinach and extract juice from them. Apply it on the forehead and wash off after two hours. This is a natural and effective way to get baby hair on the forehead.


Read My Beauty Diet: The Right Way to Lose Weight


Cumin seed mask

Cumin seeds in glass at local market, indian spices

Cumin seeds contain a high amount of antioxidants and amino acids which play a major role in growing baby hair. Since cumin seeds have more than 100 nutrients, they show positive results in hair growth. Take some cumin seeds and soak them in water. Grind them to a make a paste and add some castor oil to it. Massage your forehead and scalp with this oil. Leave it overnight and rinse off with lukewarm water later.

Gelatine

Due to amino acids like proline, gelatine can help you grow baby hair on the scalp easily. Amino acids found in gelatine can help in boosting hair growth and also keep your skin moisturized. Take 2-3 spoons of gelatine and add it to cold water. Add one spoon of honey and one spoon of apple cider vinegar. Mix all the ingredients together and massage this mixture on your scalp. Rinse off with lukewarm water.

Onion juice

Fresh onion bulbs isolated on white background

Onion contains a high amount of sulfur, which can help in growing baby hair on the forehead. Take some onions and cut them into pieces. Now extract juice and apply on the forehead. Allow onion juice to dry hair. Wait for some time and rinse off with cold water. This remedy can help you grow baby hair on the forehead.

Curry leaves

Being the powerhouse of amino acids and antioxidants, curry leaves proves to be beneficial in growing baby hair on the forehead. Take some curry leaves and grind them to make a paste. Add 1-2 drops of castor oil and mix together. Apply the paste on the forehead and wash off with cold water after some time. Use this curry leaf mask every day to encourage the growth of baby hair on the forehead.

Summer Go-To Hairstyles for Natural Hair

With summer on its way, we’re all gearing up for a season of protective styles! From braids, faux locs, to slayed frontals, summer is sure to be filled with black hair magic. As we twist and braid down our curls for these styles, we have to be mindful of how we take care and maintain the edges we have left after Beychella. It is important to preserve the health and thickness of not only our crown but the perimeter of our fros. Giving your edges a little extra TLC during a protective style is key to flourishing hair even when in wraps.

Oils, Oils, and More Oils

The edges of our hair are the most fragile strands on our entire head. They tend to go under the most manipulation given they are the accent to even the most simplistic styles. They are also one of the most ignored areas when oiling one’s scalp as we often tend to focus on the center of the crown. Our edges need love too! Massaging your edges with your favorite oil can not only strengthen the hair strand but the actual hair follicle as well.

Stimulating hair growth and promoting durability during a protective style is achieved by just applying a small amount of oil to your fingertips and massaging gently every night. Many hair experts recommend doing this after a hot shower as the follicles are nice and open from the steam. Castor, Argon, and Olive oil are go-to oils for most naturals when it comes to this method as they act not only as food to the edges but gives the hair a gentle hold before edge control.

How to get rid of baby hair?

Isn’t it annoying when you dress up for a party with your hair tied back tightly but a puff of hair still dangles on your forehead? No matter how much you try, you can’t shape them the way you want. These curls are called baby hairs, and in most cases, your genes are to blame for having them. As annoying as they are, you can get rid of them easily by following a few tricks. Here’s what you need to do.

Three Ways to Get Rid of Baby Hairs

  1. Apply Natural Oils
  2. Use Hairspray
  3. Change Your Hairstyle

Natural Oils That Tame Baby Hairs

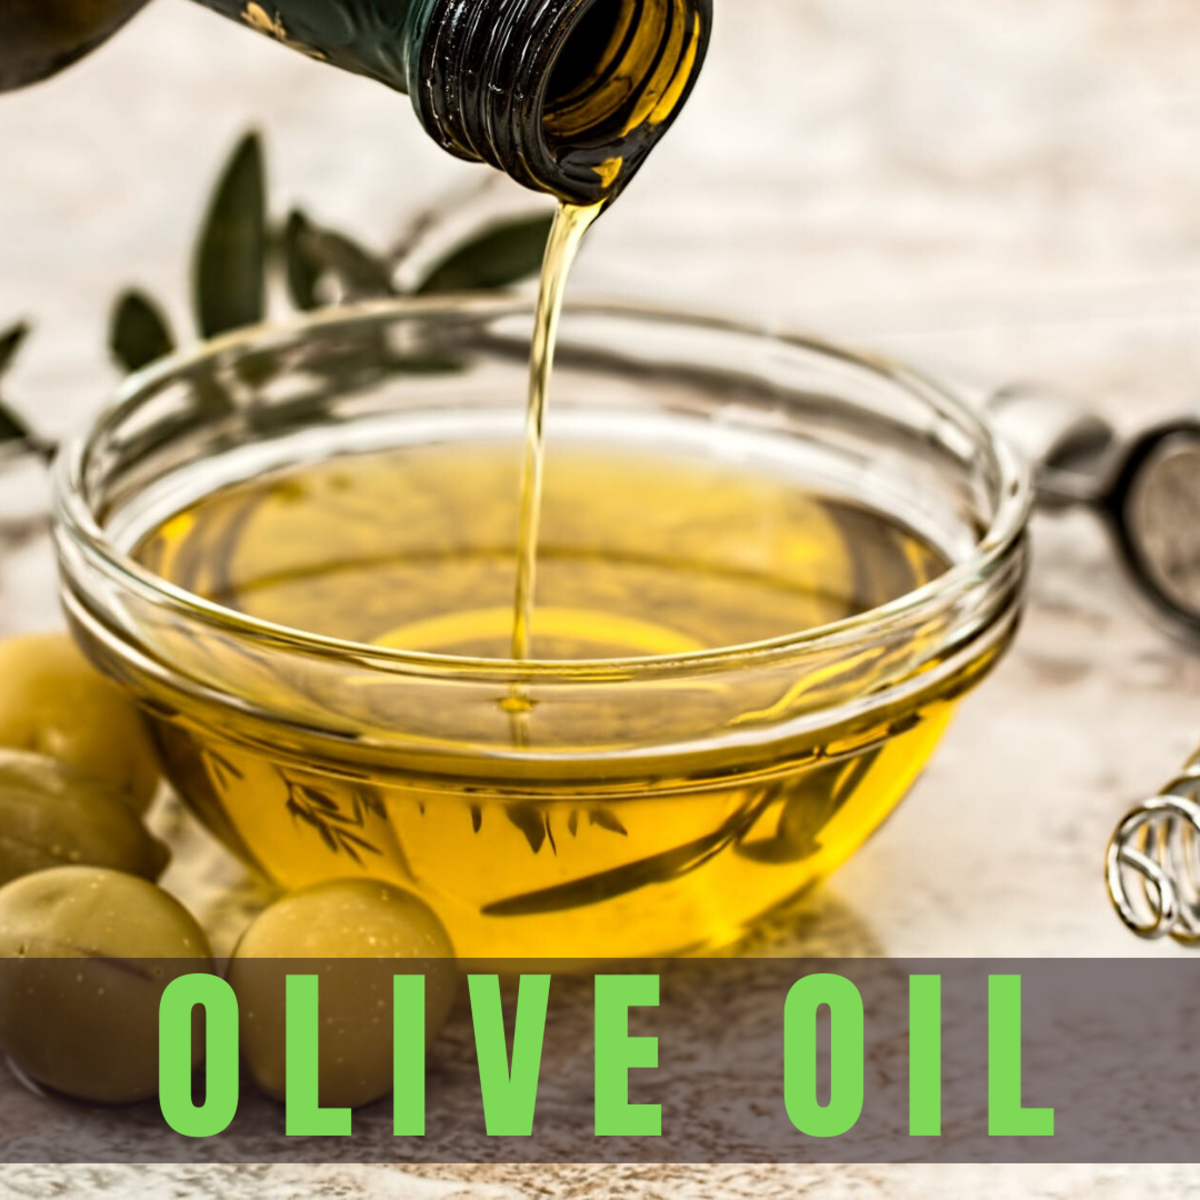
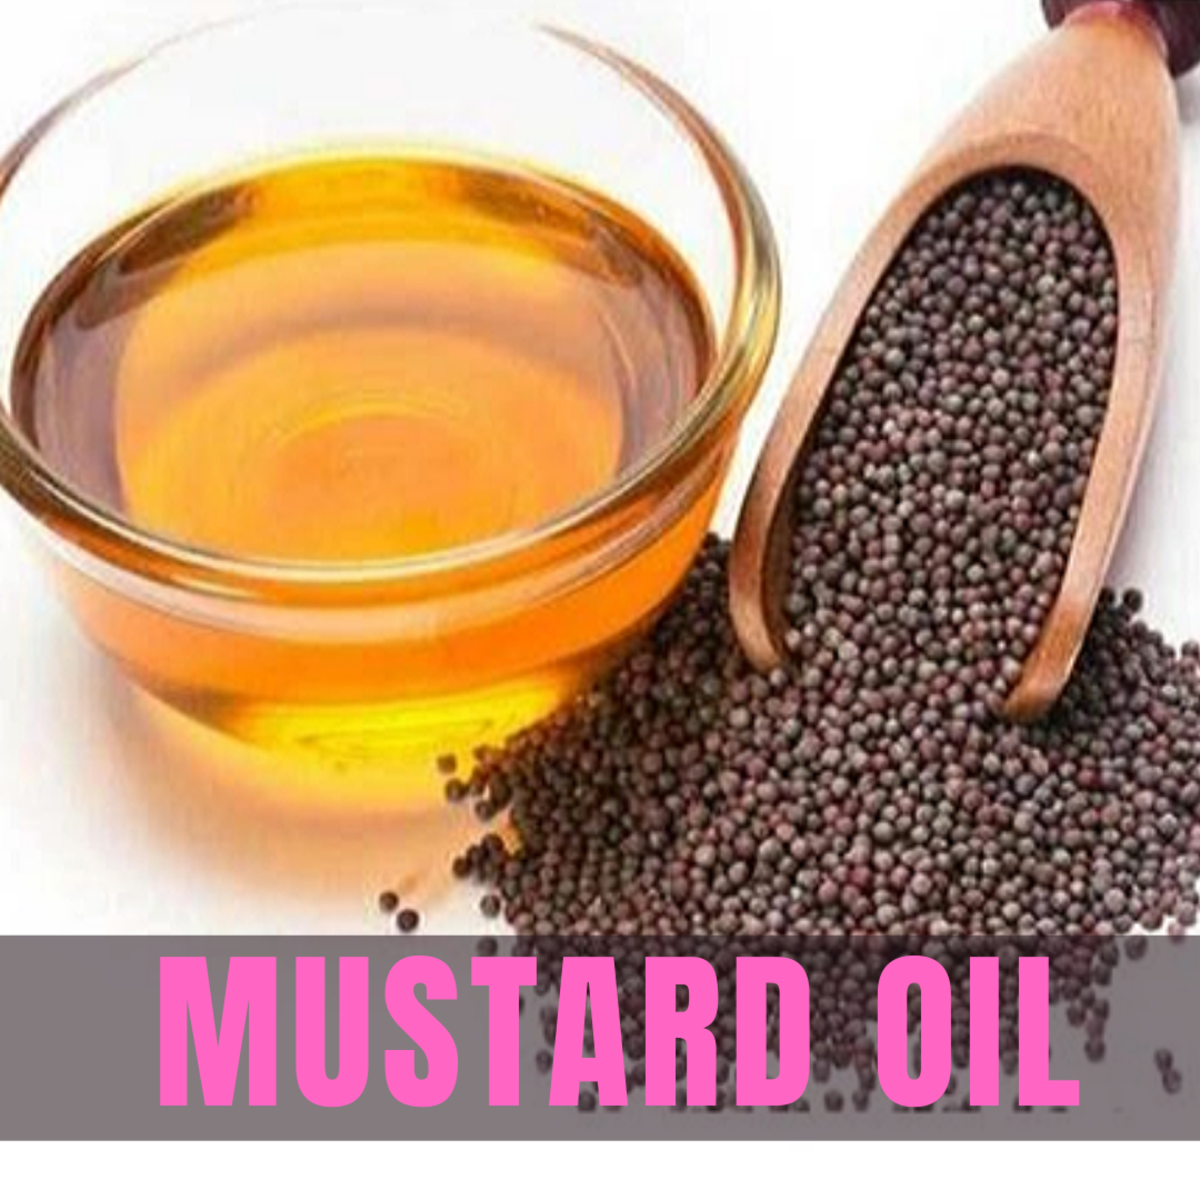
Olive oil, mustard oil, coconut oil, and almond oil are very effective in getting rid of baby hair. Let’s take a look at the properties of these oils and how to use them.

Coconut Oil

Unrefined, virgin, or extra-virgin coconut oil are not only good for your skin but they can also remove baby hair within a few weeks. Coconut oil stops free radicals from damaging your skin, prevents infection, lessens inflammation, and slowly reduces the amount of baby hair on your face.

How to Apply Coconut Oil

  1. Liquefy a tablespoon of coconut oil.
  2. Gently rub it on your palms and massage it on your baby hair. Try to reach the pores. If you don’t have a lot of baby hair, then it shouldn’t be challenging to massage the oil on the intended area. You can also dip cotton balls in the liquefied coconut oil and apply it on your baby hair.
  3. Do this at least twice a day. You will notice that the baby hairs have disappeared in a few weeks.

Olive Oil

Olive oil is widely popular for its antibacterial and antioxidant properties, Vitamin content, and moisturizing effects. When mixed with alum and rosewater, olive oil can successfully remove baby hair in a few days.

How to Apply Olive Oil

  1. Take a tablespoon of olive oil, a tablespoon of rosewater, and a pinch of alum and mix everything thoroughly.
  2. Apply this mixture to your baby hair.
  3. Allow it to dry before applying another coat.
  4. Repeat the process until you have applied six coats of this mixture.
  5. Wash your face with lukewarm water and apply a few drops of olive oil again. Repeat every day for optimal results.

Mustard Oil

Mustard oil keeps your skin soft, smooth, and supple. But it is also a champion in removing baby hair. Its antibacterial properties keep scalp infections away.

How to Apply Mustard Oil

  1. Apply mustard seed paste or high-quality mustard oil on your baby hair before going to sleep at night. You should see noticeable results in a matter of days.
  2. Keep applying mustard oil every night until there is no baby hair left at all.

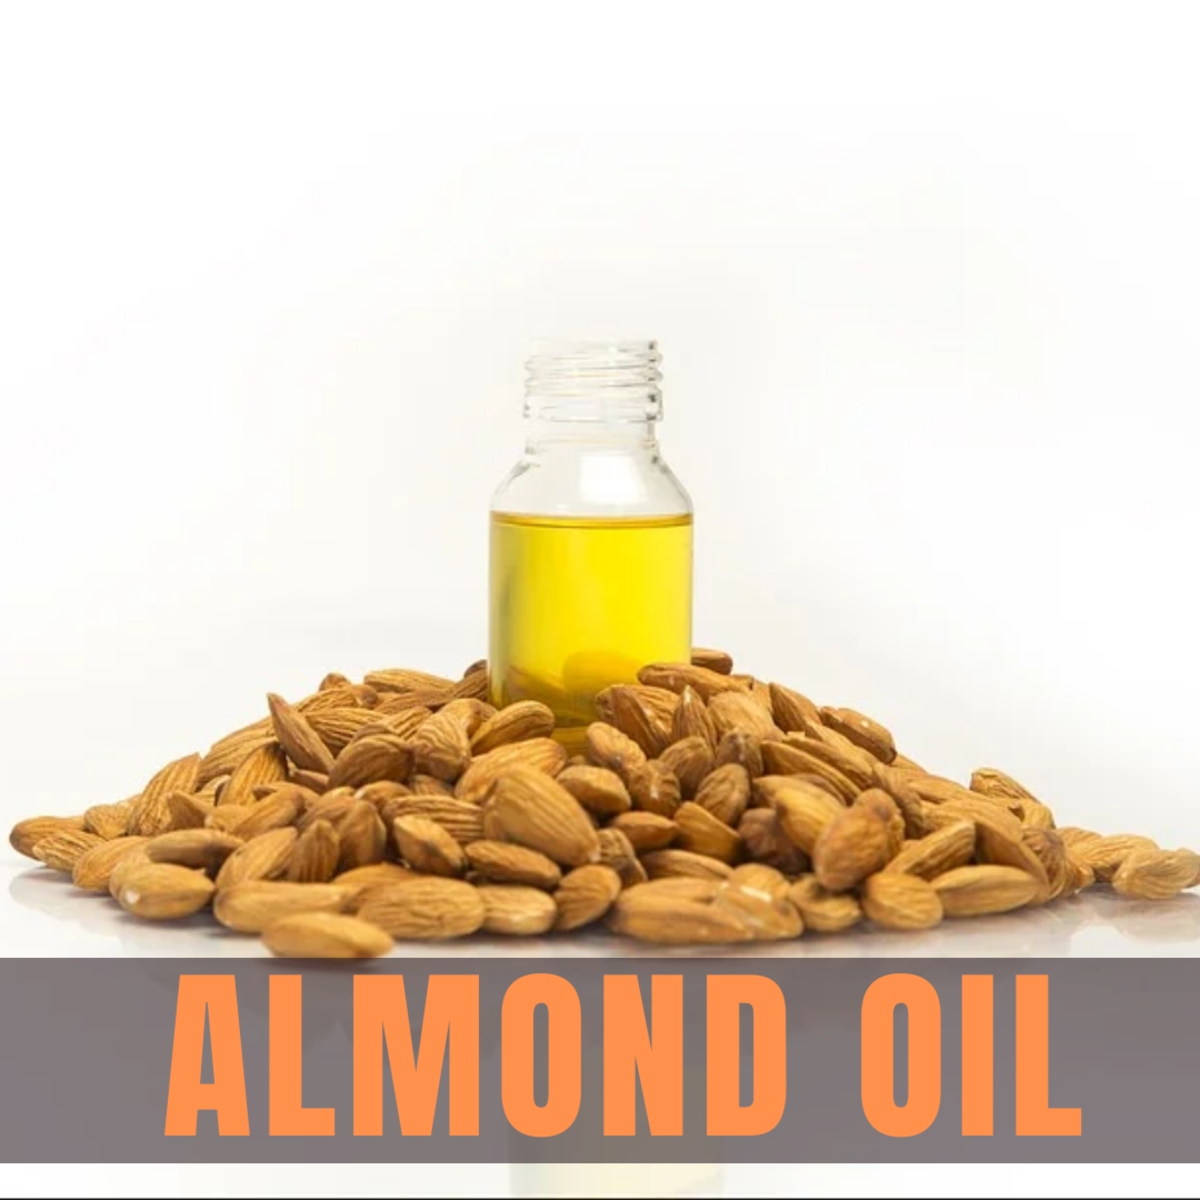
Almond Oil

Almond oil can fix split ends, control scalp infection, treat dandruff, and make your hair shiny. In addition to all these benefits, it can also get rid of baby hair in a few weeks.

How to Apply Almond Oil

  1. Mix a tablespoon of almond oil with a tablespoon of Indian gooseberry powder. Make sure there is no lump in the paste.
  2. Dip your fingertips in this mixture and massage it on your baby hair. Do this before going to sleep to allow the almond oil and Indian gooseberry to work their way into the roots of your baby hair.
  3. Repeat this technique every night to see a reduction in the amount of baby hair on your forehead within a few weeks.

Hair Products for Baby Hairs

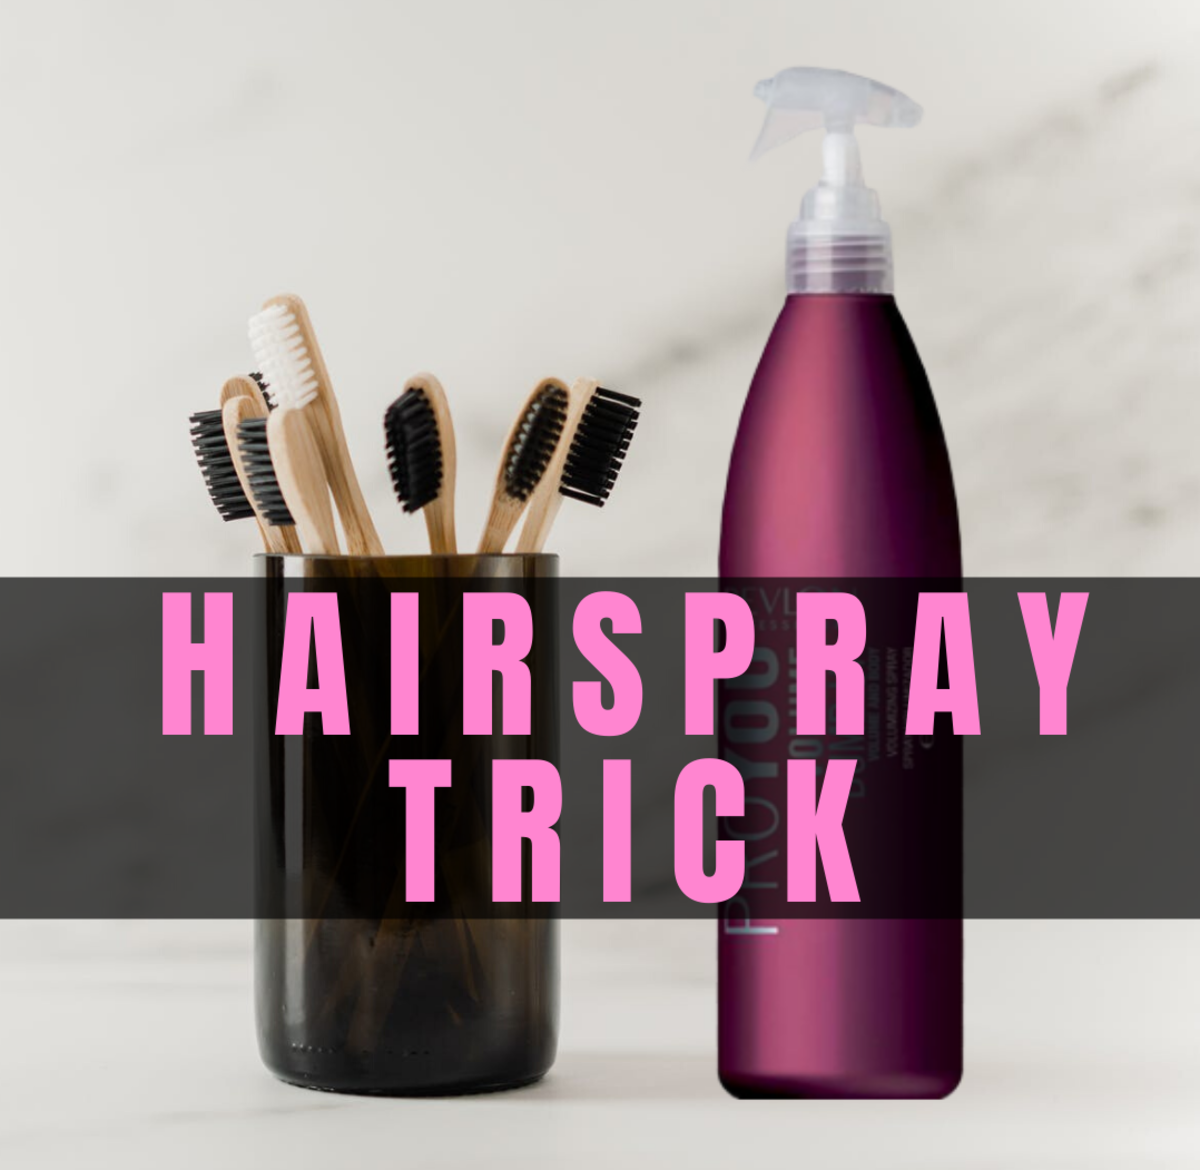
Apart from different natural oils, you can also use a variety of hair products to get rid of baby hair. While many women advise shaving off baby hairs before going out, it is not a permanent solution. The best alternative to tame down your baby hair is by using a hairspray trick. In fact, you can use hairspray and finish things off with an anti-frizz cream.

How to Tame Baby Hairs With Hairspray

  1. Take a new toothbrush and a bottle of high-quality hairspray.
  2. Sprinkle a few drops of hairspray on the bristles of the toothbrush.
  3. Rub the bristles gently on your baby hair.
  4. Apply a bit of pressure while rubbing the bristles. Keep applying the pressure until you feel the bristles don’t contain any hairspray anymore.
  5. Repeat this process until the baby hair sets with the hairstyle you want.

How to Use Anti-Frizz Cream

Once you set the baby hair with your hairspray, you can put some anti-frizz cream on it to keep the hair in the position you want. It is almost like applying a hair pomade. The anti-frizz cream will not let the bay hair fall off from its intended position, giving you the confidence that they won’t mess up your look once you step outside.

Shaving Baby Hairs

You should follow this technique religiously every day. Shaving baby hair off should only be considered a last resort as it can damage your entire hairstyle. You need to make the baby hair follow your hairstyle and not dangle on your forehead like a loose piece of chicken from a burger.

Hairstyles to Mask Baby Hairs

If you don’t want to lose your baby hair, the best thing you can do is change your hairstyle so that you can at least mask those dangling hairs from your forehead. One of the best hairstyles to hide your baby hair is a pixie cut.

First of all, try not to overheat your hair. In fact, it is best not to use a heat styling tool if you want to mask your baby hair. The baby hair should look natural when you change your hairstyle. Ask your hairstylist to give you a fringe or pixie cut. It is one of the cutest hairstyles sported by tons of celebrities. While it may be a drastic makeover for you, it’s worth giving a shot.

Ideally, it is better to straighten your hair if you want a pixie cut. The sides should be absolutely straight to complement the pixie style. This will give a nice shape to the pixie cut on your forehead. The length of hair covering your forehead due to the pixie cut will hide your baby hair. You will not have to chop it, shave it, or brush it.

Say Goodbye to Baby Hairs

Baby hair looks cute on some women. But for many, it is an extra lump of hair that doesn’t add any value to their hairstyle. But instead of shaving it every time, you can follow the tricks mentioned above to either hide them or get rid of them for good. Using natural oils will remove baby hairs but it usually takes time to notice positive results. Using the hairspray trick and changing your hairstyle, on the other hand, helps you solve the problem in an instant. The decision is yours to make.

Sources

  • Coconut Oil for Your Hair: Benefits, Uses and Tips
    This article explains everything you need to know about coconut oil and hair: why you might want to try it, how to use it and more.
  • The Benefits of Olive Oil for Hair – How Olive Oil Can Help Your Hair
    Sometimes the best hair remedies can be found at home — usually right there in your kitchen. We’d like to introduce you the benefits of using olive oil for hair.
  • What to Know About Using Mustard Oil for Hair
    If you’re thinking about using mustard oil for your hair, or, already have been and want to learn more about it, here are a few things to know including benefits, ways to use it, and risks with this potent oil.
  • Almond Oil for Hair: Benefits and Uses for Longer, Stronger Hair
    Learn about the benefits of almond oil for hair.